7 ways for fast portrait retouching in Lightroom
Have you experienced such moments when you had to process your photos extremely fast, and you didn’t have enough time to make additional editing in Photoshop? At such moments you can use the following several Lightroom photo editing techniques.

1. Spot Removal
The first and the most evident action that will help to improve the skin of your model is to apply local corrections Spot removal (hotkey Q) on Develop tab. For skin retouching select Heal mode. Feather 50, Opacity 100, brush size can be changed if required with square brackets keys on your keyboard ([ – decrease, ] – increase).
If you do this accurately you will get a very good result quite fast. The rules are the same as when using Photoshop. The size of a brush is a little bit more than a spot that we remove.
We use a brush only on the homogeneous surface, so the sample doesn't get to contrast borders of the image, in another case we will get multiple muddy spots instead of perfect skin.
Quite often you will use Spot Removal to remove single pimples and spots, not for extensive retouching, but if you are skilled enough everything is possible.

2. Move clarity cursor to minus for large portraits
This trick will help you if the texture of the skin of your model is rather detailed (sharp light, large pores on the skin, various cosmetic defects and imperfections). Here everything is simple: in main settings move a clarity cursor to the left, until the portrait looks better for you. Do this very accurately, not to make the image look blurred, what sometimes may happen and is widely discussed.

3. Soften Skin mask to remove skin roughness
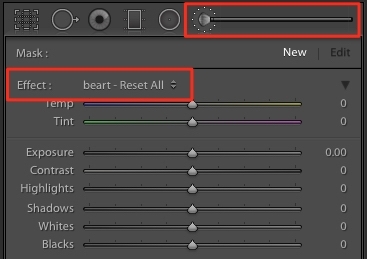
Almost the same technique, as described above, but it works more delicately. In local corrections (move to this mode with brush icon in Develop or use a hotkey K) there is a standard preset Soften Skin. Press Custom and you will see a drop-down list. Select Soften Skin and using the brush with the ready-made settings work on the skin areas that you would like to improve. The advantage of using this brush is that you can use a separate layer to edit separate areas of your portrait, that need to be improved.

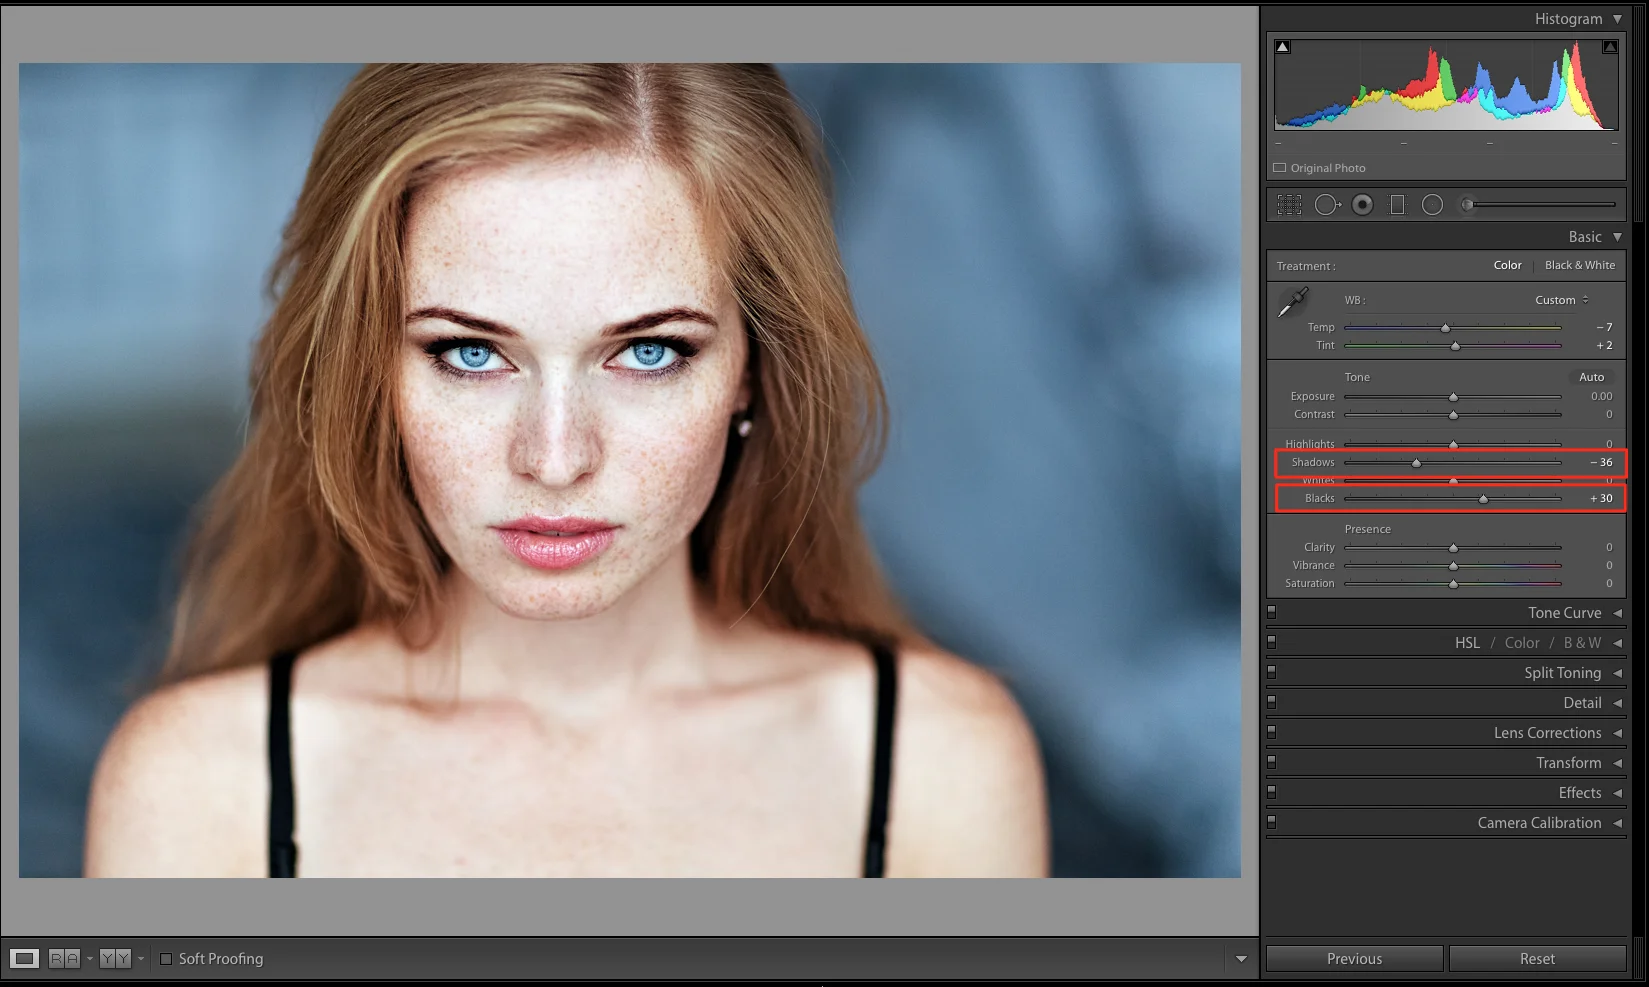
4. Shadows to minus, Blacks to plus
Such manipulation will decrease the visual contrast of shadows and lights, so the skin will seem more smooth. In some cases these settings can spoil a shot completely and make it flat, so use this technique very careful.
5. Highlights to plus, Whites to minus
This method will help you if there are oily shiny areas and very sharp hot spots on the skin of your model, and the above-mentioned method with Shadows hasn't helped you. The skin will look matted after such manipulations, but the whole volume of the image can be significantly lost, so don't overdo this.

6. Raise black points on tone curve
If the light on your portrait is too sharp, you may raise a black point on tone curve (bottom-left tail). At first glance, the method is very similar to the technique where you move Blacks to plus. However, you can achieve a special effect using these settings of the curve. If there are strong highlights, you can try to move a point on the curve slightly lower. The lights will get a grayish tint. But nowadays this is often used as an artistic effect when processing photos.

7. Increasing sharpness with a brush
All the above-mentioned techniques of "fast" retouching in Lightroom are based on contrast reduction more or less. So we "spoil" the photo on purpose, sacrificing sharpness and details of the shot to make the skin look smooth. Additionally, to reduce the effects of these methods, you can increase the sharpness in such areas as eyes applying the brush with increased sharpness and clarity moved to plus. And the most important – don't overdo. Make sure the sharpness won't turn to unpleasant graininess.

Now the skin of our model looks more soft and shining. Almost all the mentioned methods were applied to the portrait of this girl.For sure, such retouching is destructing (we have lost the volume and texture of the skin), but if you are not going to improve the image in Photoshop, the provided result will satisfy the viewer. The methods of processing can be used separately and combined with each other (the best variant is when your image is perfect, and you don't need to apply additional techniques to improve it).

As always I remind you that everything depends on your skills whether the shot will look more impressive after being processed or will be spoiled completely. You will learn how to use the tools skilfully only when you practice constantly. Happy working!

Check out our Best-Seller Collection.
https://www.beart-presets.com/shop/portrait-retouching-lightroom-presets