13 Tricks & Tweaks to Speed Up Photoshop CC Performance
The majority of programs that serves to process photos are highly demanding of your computer resources, and our favorite Photoshop – is the leader as far as “voracity” is concerned. Even if you don't work with huge TIFF files and don't make a complex processing with dozens of layers, nevertheless you can make Photoshop work faster. We have created a list of simple and effective methods that will help to speed up Photoshop performance.
1. Memory usage adjustment
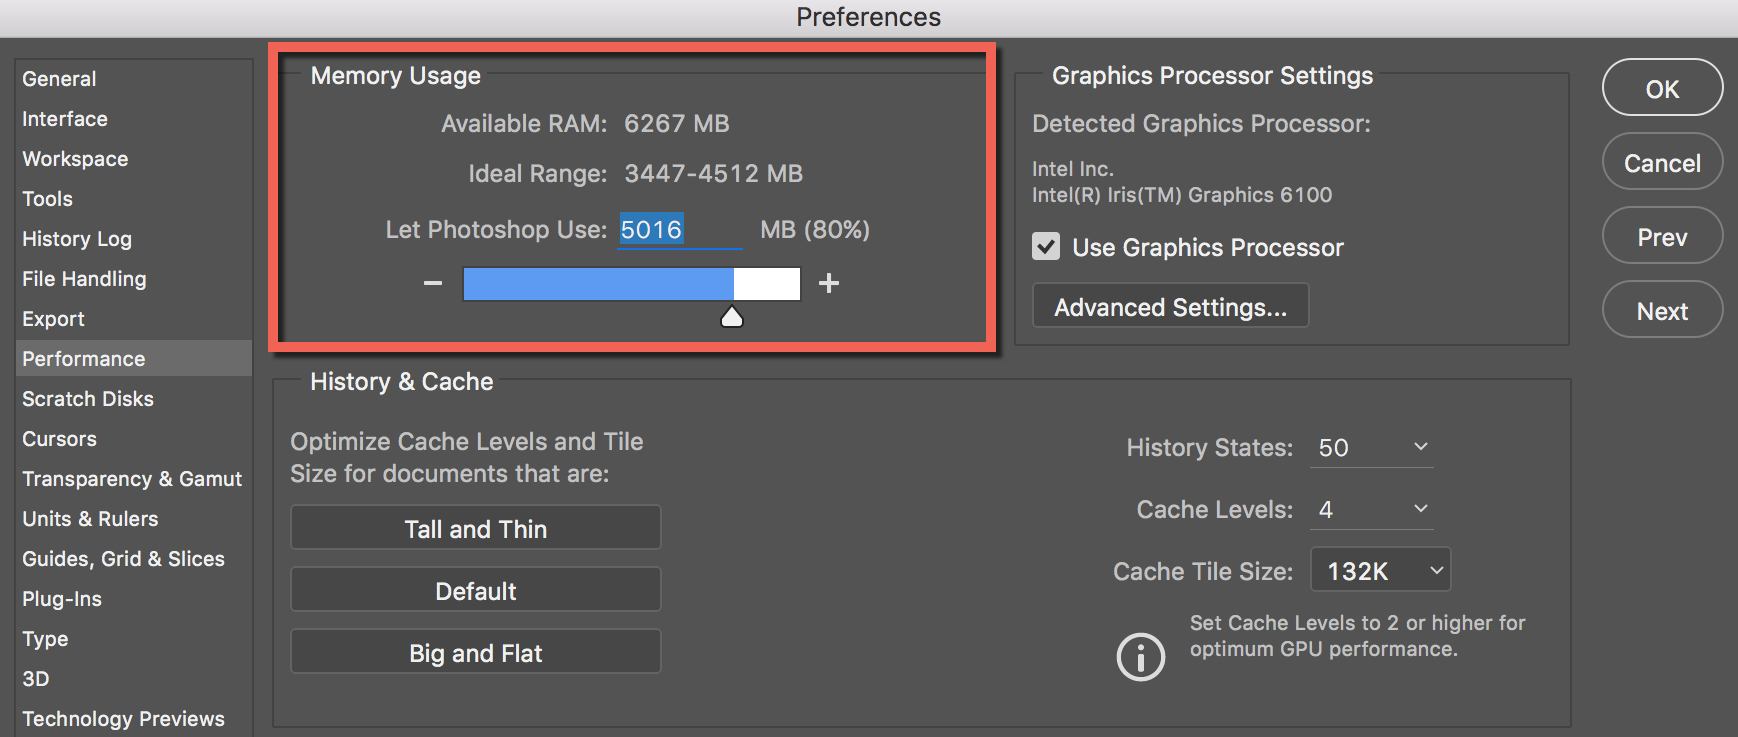
As you see, the more memory is allocated for Photoshop, the faster the program operates. In memory settings you can see the memory available for the program, namely not the whole amount of memory, but the free memory that can be allocated precisely for Photoshop. By default, Photoshop uses 70% of available memory.
For the majority of users of 32-bit Photoshop version, 70% is enough for optimal work. If you need more, try to add by 5% and watch the performance indicator (read about it a little bit below). For 32-bit version, the usage of 100% of the available memory can cause problems.
To change the amount of allocated memory go to (Windows) Edit > Preferences > Performance or (Mac OS) Menu Photoshop > Preferences > Performance.
If possible, you should use 64-bit Photoshop version, which allows allocating up to 100% of memory for your work. (2020 UPDATE: See this article for managing performance in Photoshop CC 2020).
2. Page file
When a program works with an extensive amount of information and this information doesn't fit random access memory (RAM), the program starts to record data into a “page file” on a hard drive. Namely, the file fulfills the role of RAM. The trouble with the page file is that the data recording on hard drive goes on slower than on RAM. Moreover, your operation system also saves its data to the page file, and this loads the hard drive with additional work.
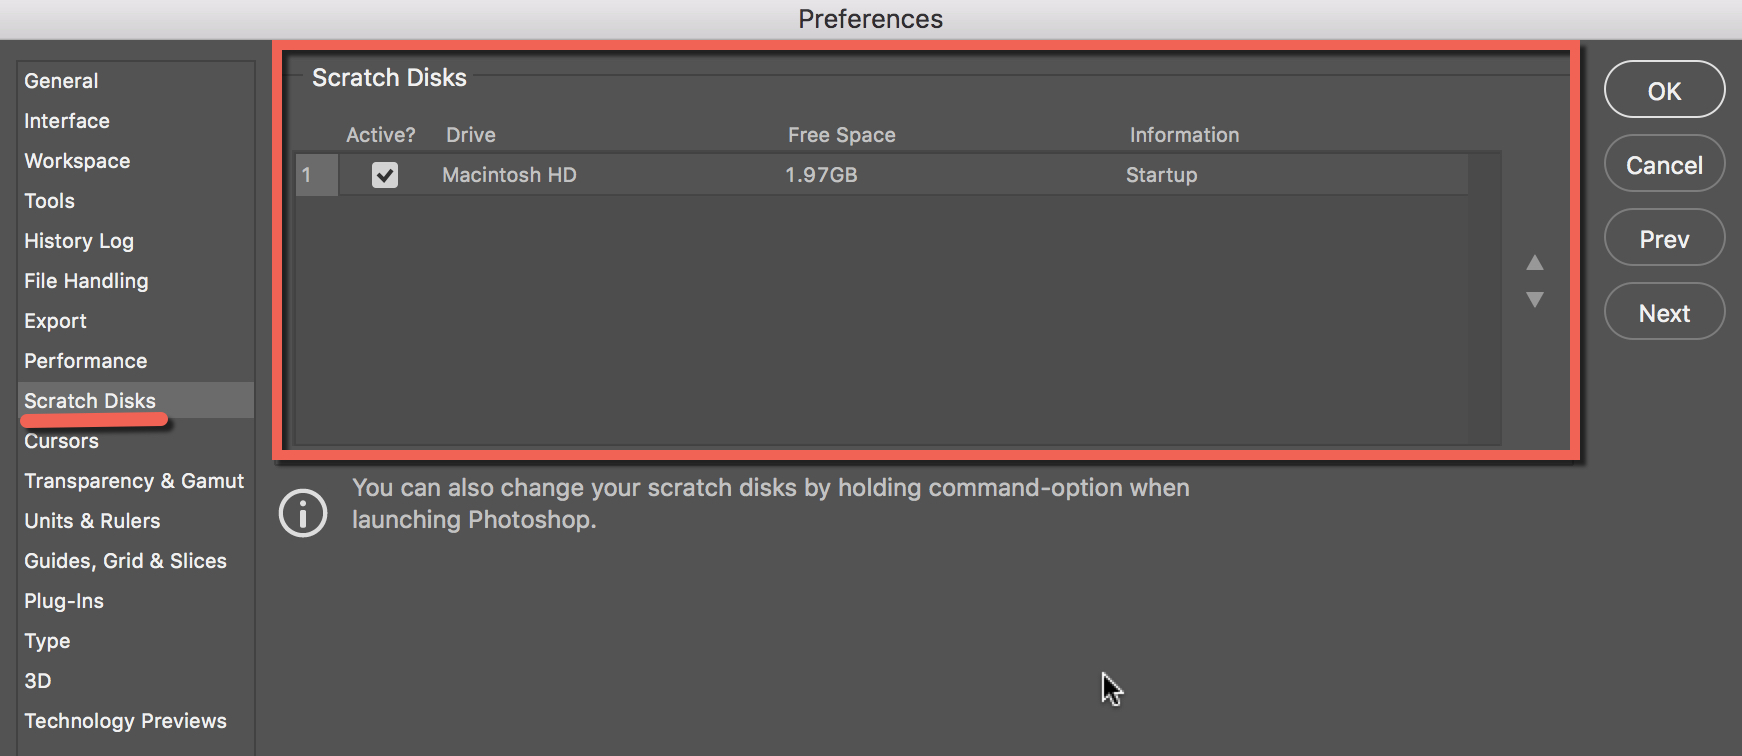
The best option is to use a separate disk as a page file. The ideal variant is to use SSD disks, which are much faster than their HDD prototypes. However, even the usage of general HDD will reload the primary drive, which will be busy only with OC work.
You can choose the hard drive for the page file in the same menu (Windows) Edit > Preferences > Performance or (Mac OS) Menu Photoshop > Preferences > Performance.
3. History and cache settings
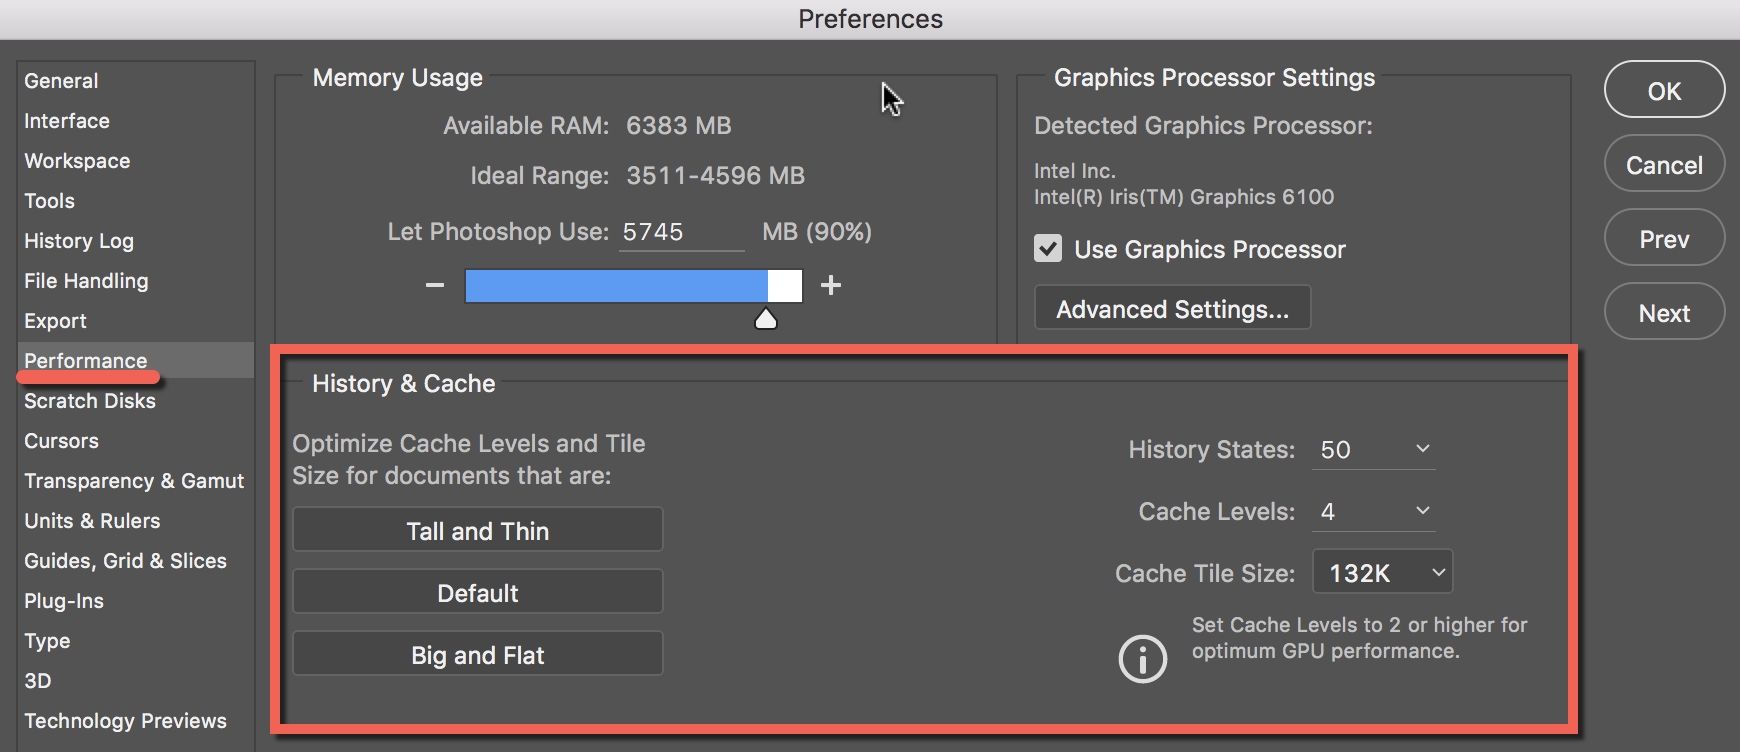
This setup panel is located in menu (Windows) Edit > Preferences > Performance or (Mac OS) Menu Photoshop > Preferences > Performance.
Cache Levels
Photoshop uses cache to display an image quickly. If you work with small or average files, 1280x1024 pixels and many layers (50 and more), set cache levels to 2. If you work with large files, 10 MB and more, set cache levels to 4 and more. The higher value of cache level speeds up the display process.
Cache title size - responds to the volume of data, that photoshop processes at a time. Larger volumes speed up the overall manipulations with an image, for example, sharpening. Smaller volumes work faster when you change small areas of the picture, for instance, work with a brush. For new processors, it's recommended to choose 128 K or 1024 K. For old ones (very old) 132 K or 1032 K.
History States
Each operation saved in the history increases the “page file”. Accordingly, the less data you will be storing in history, the less place Photoshop will take. If you always work with the copy of your layer, it's enough to leave ten last actions in history.
4. GPU Settings
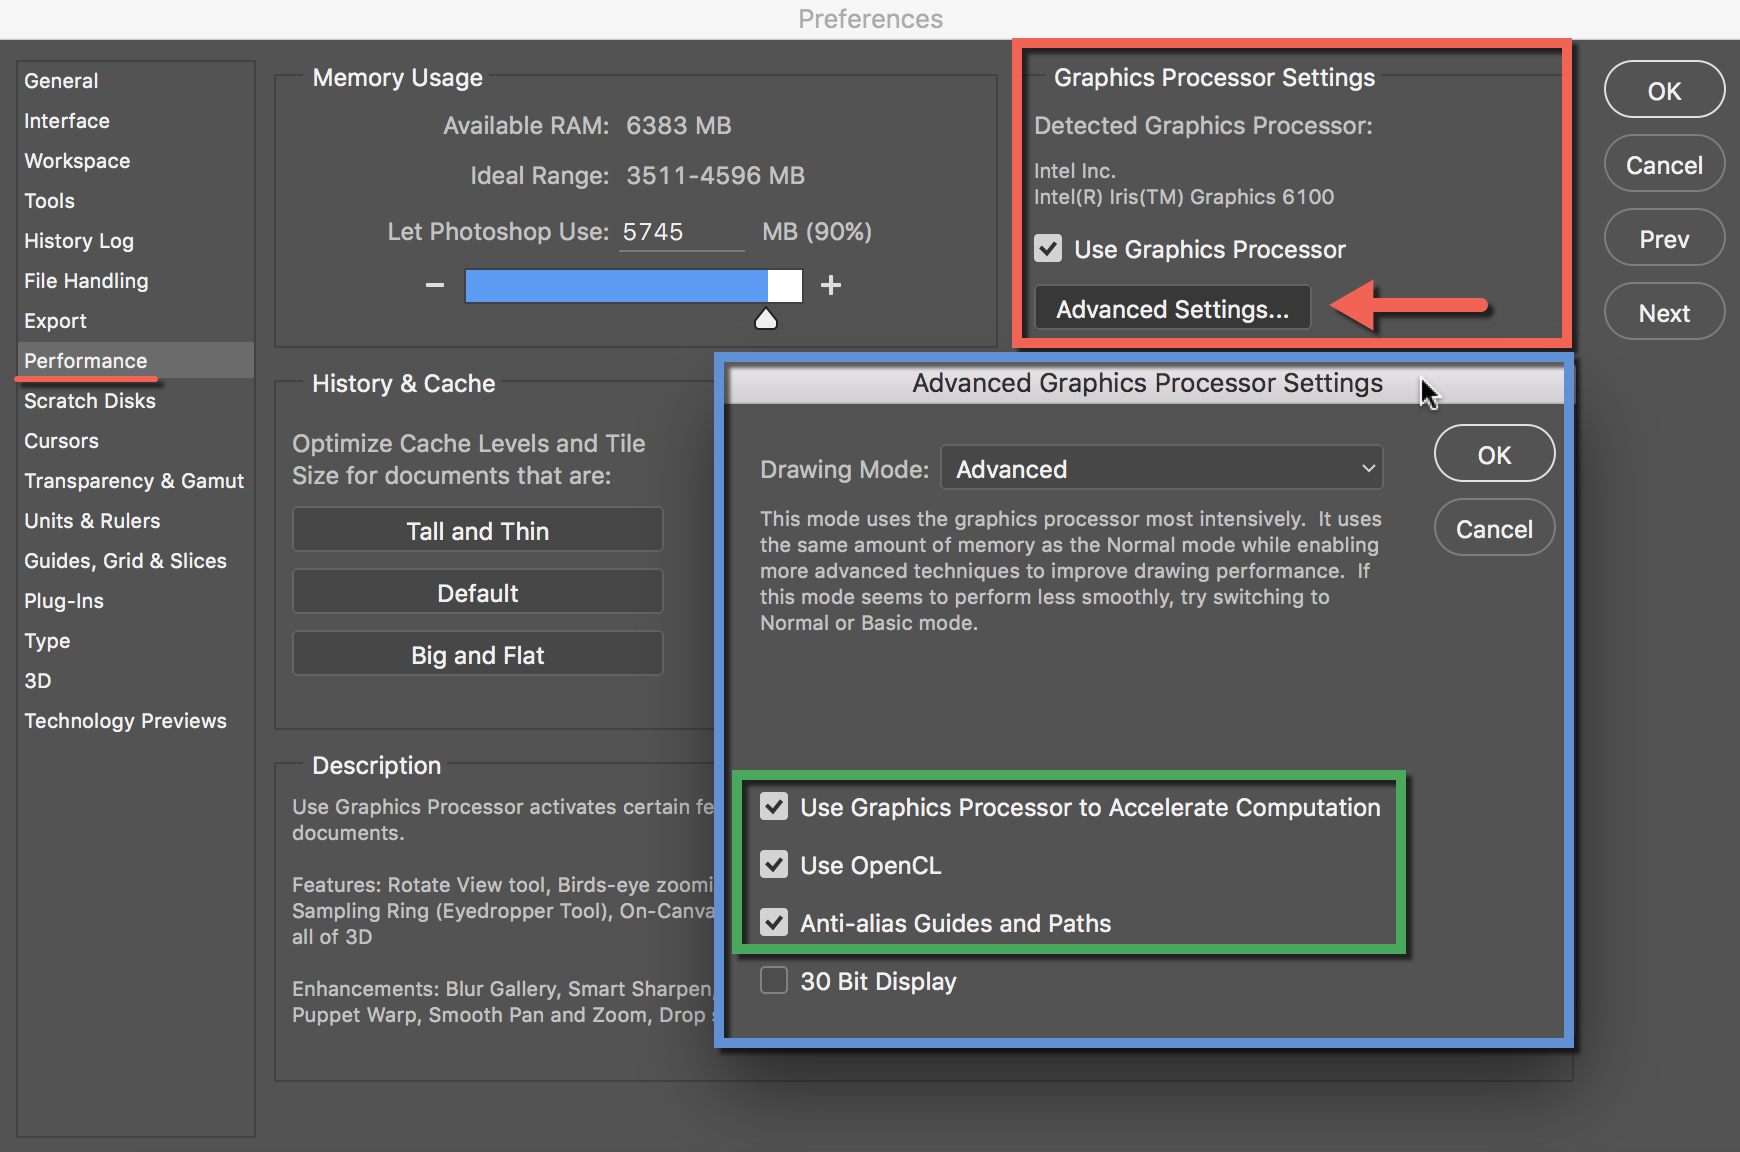
Photoshop CS4 and CS5 uses the capabilities of your video card to speed up the display of the image. To allow Photoshop get access to the video card resources, it should supportOpenGL standard and have minimum 128 megabytes of memory.
To have the access to your video card resources just place a mark. And to enjoy the maximum of the available opportunities we advise you to update the driver for your video card. After we have finished to setup the basic parameters, we can move to the general advice relating the optimization of the Photoshop performance.
5. Watch the efficiency indicator
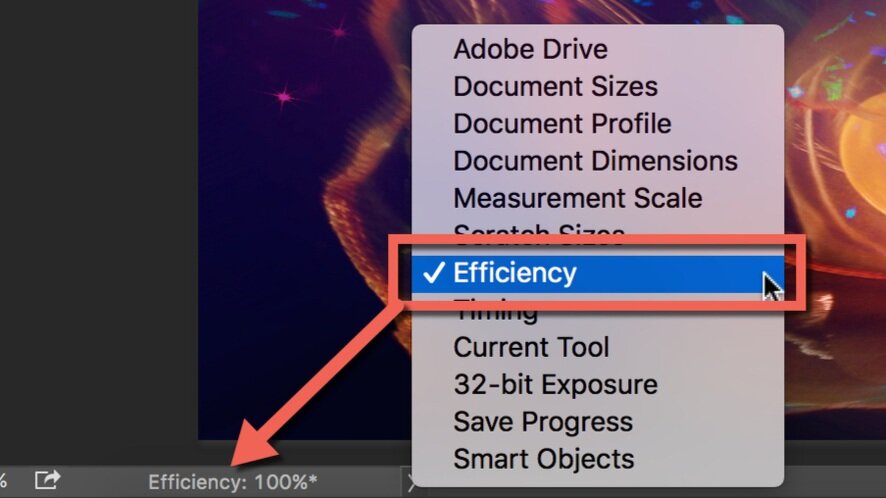
The efficiency indicator will show you when Photoshop will deplete the available memory and start to save data to the page file.
To display an indicator, press an arrow under your image and choose Efficiency.
The values below 90-95% indicate that Photoshop uses a page file, and consequently this slows down the system and points out that you should provide more memory in photoshop settings or add RAM to your computer.
6. Close unused windows
In Photoshop CC windows with documents use more memory than in previous versions. A lot of open documents slows down the work intensely and can lead to the lack of memory notification.
In Mac OS, there is a function "Application frame" (menu Window > Application Frame), it's turned on by default. If you choose to use it, remember it's also using memory.
7. Decrease the amount of patterns and brushes in Photoshop CC
Photoshop brushes, patterns and layer styles significantly overload the system. Besides, each of them overloads little by little and as a result, the system is clogged with junk, that is rarely used.
To see the patterns in Photoshop go to the menu Edit > Preset Manager and choose Preset Type > Patterns или Brushes.
8. Disable layers and channels preview
In Layers, Channels and Paths Photoshop shows small thumbnails of the image. Consequently, the more layers you have, the more memory is spending.
To decrease or turn off the preview, go to Panel Options and Turn off the Preview.
8. Use the images with 8-bit colour depth
Photoshop can work with 8-, 16- and 32- bit images. However, as a rule, for tasks that are not related to professional photo correction and preparation for print, it's enough to work with 8-bit images.
To change your file to 8-bit can be done to Image > Mode > 8 Bits/Channel. This will immediately reduce the file size, and thus reload your computer by half.
9. Decrease number of fonts to display
(Win) menu Edit > Preferences > Type (Windows) or (Mac OS) menu Photoshop > Preferences > Type and decrease number of fonts to display for example to 5.
10. Decrease the file size
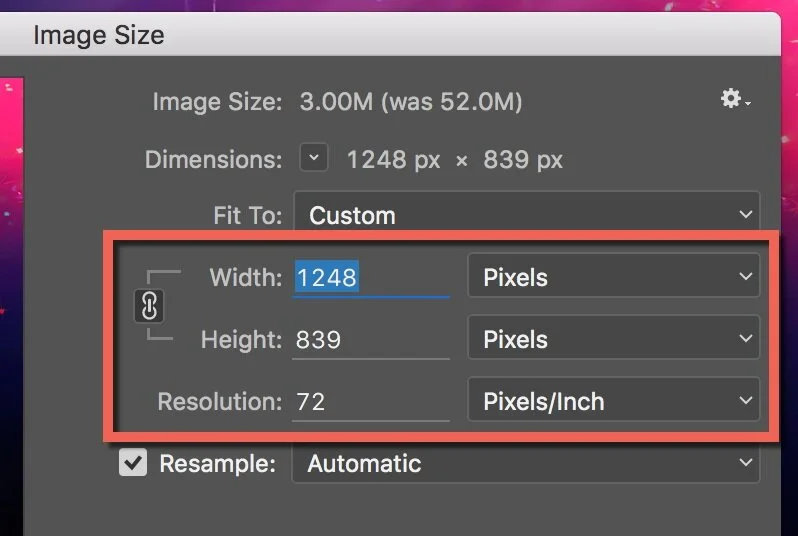
If you are planning to use your file on the internet and it should not be large, you can safely decrease your files up to 3000 pixels’ length and work on them further.
You can decrease a photo through the menu Image > Image Size.
11. Data reset
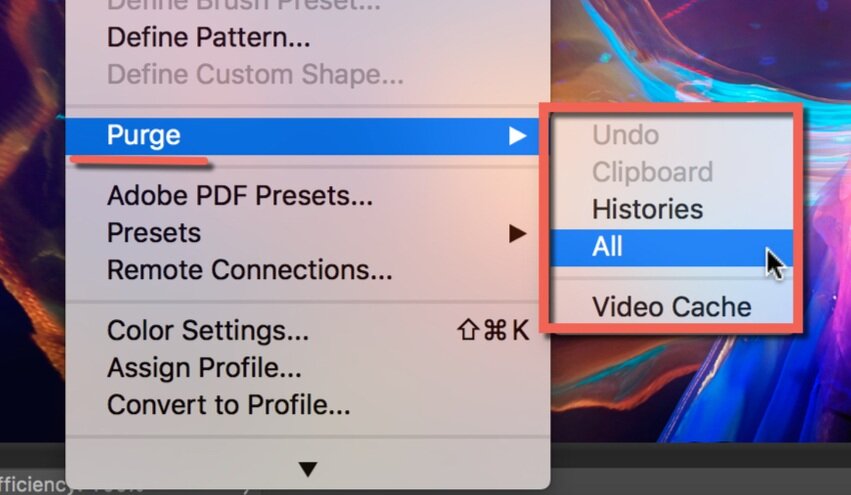
History panel and clipboard stores a significant amount of data. To reset the data go to menu Edit > Purge and choose Undo, Clipboard, Histories, or All. As a result, the data related to Undo, Clipboard, History or all at the same time will be reset. Be attentive, this command can not be canceled.
12. Organize the layers
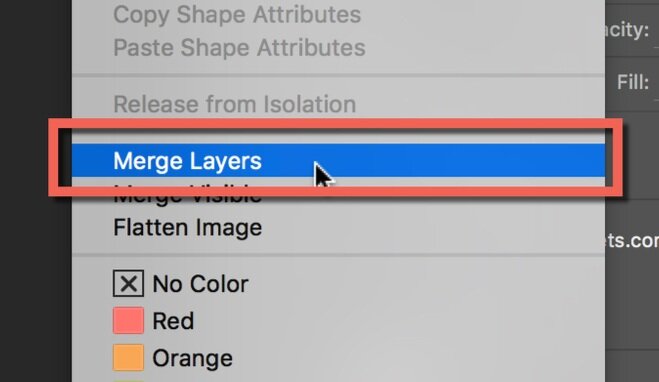
Layers are the basis of Photoshop work, but they increase the size of the file and the volume of the memory used. If you have made all the necessary manipulations, merge the layers. To do this select the required layers, click on them with the right mouse button and choose Merge Layers.
To combine all the layers, go to menu Layer > Flatten Image.
The creation of Smart Objects will save your place on disk and increase the flow of work. Choose a layer, click on it with the right mouse button and select Convert to Smart Object.
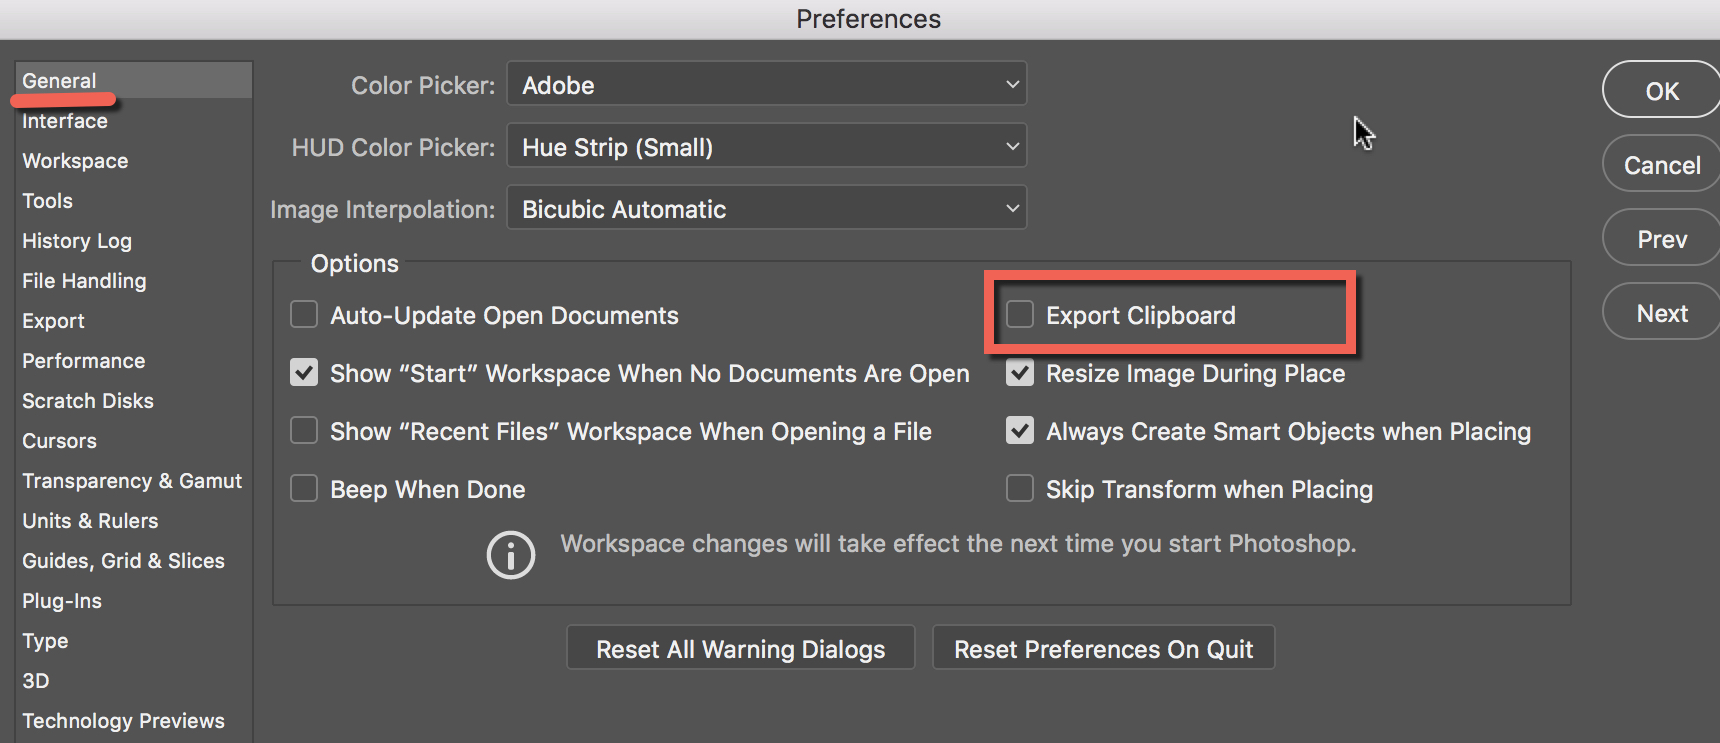
13. Don't export an image to the clipboard
If you don't copy data outside the program, disable this function: menu (Windows) Edit > Preferences > General or (Mac OS) Photoshop > Preferences > General > Disable Export Clipboard.
I hope, these tips will help you to optimize your Photoshop CC performance.
You can also check out our article about how to speed up Lightroom.


