Three Ways to Duplicate Images in Lightroom Classic
There are many reasons you might want to duplicate an image when you're working in Lightroom.
The question is - is it easy to do? It is relatively easy, so let us walk you through the steps. Creating copies of your work is a fundamental step that anyone using Lightroom should know how to accomplish.
About Lightroom
Lightroom is our editing software of choice and the go-to software for most serious photographers. If you're asking how to duplicate an image, then it's because you're pretty new at using the program. Understanding how the program functions and handles images will be beneficial and is a critical first step.
In most editing programs, Adobe's Photoshop included, you just click on the "save as" command when you want to copy or duplicate an image. For example, if you did this in Photoshop with a 25MB RAW file, you would end up with three to five editing versions, each over 1GB by the end of the process.
And then along came Adobe's Lightroom, which proved a game-changer for editing RAW photos (like Afetr Effect, that have free After Effects plugins). It improved Photoshop's editing workflow and made bulk editing so much easier!
Nondestructive Editing
Yes, you read that correctly: nondestructive editing. Lightroom editing workflow is based on nondestructive RAW editing. But what does that mean? Let's discuss RAW file formats first.
The RAW file format contains a large volume of data collected from pixels of the digital sensor. It's the best format to work with if you know you'll be making edits in your post-processing workflow. However, to see the representation of that data, you need to use a RAW converter. That's why using Lightroom can be so handy.
If you shoot JPEG instead of RAW, the camera's image processor will interpret the data from the sensor and convert it into a JPEG image. There's no converting needed from RAW. But your ability to edit without losing quality is compromised.
Lightroom will convert RAW data collected. It takes that raw data and interprets it using a set of parameters known as a profile. It then produces a visual representation of the image with the edits in the form of a JPEG preview.
Any edits you make to an image will cause Lightroom to create a JPEG preview that contains those edits. However, Lightroom does not touch or change the original RAW file. It leaves the original intact.
Only that JPEG preview it generated includes the changes you made. This is called Nondestructive Raw Editing. Nondestructive raw editing allows you to work with some unique functionalities.
How to Duplicate A Photo in Lightroom
Thanks to nondestructive editing, here are three ways to duplicate a photo in Lightroom.
1. Virtual Copies
Virtual copies allow you to edit and save as many as you want without impacting the original. Instead, Lightroom creates a new version of the XMP sidecar file where it keeps editing instructions.
The virtual copy is simply a new set of editing instructions for the original image. Even if you go between virtual copies making edits, the original image stays untouched. Lightroom just loads appropriate XMP sidecar instructions. Creating a Virtual Copy is the most common way of creating a duplicate in Lightroom.
Here's how to create a virtual copy:
Select the image to duplicate in the Library or Develop module and right-click.
Choose the Create Virtual Copy option.
Lightroom will create a new set of editing instructions called Virtual Copy without duplicating the original RAW image.
Lightroom allows you to create as many virtual copies of an image as you want. The original RAW image won't change or be altered thanks to nondestructive editing. The only changes are the editing instructions saved in the text file (.XMP).
2. Duplicate A Photo Using Snapshots Panel
This is another way of duplicating an image. Using the Snapshot function, you can create multiple versions. It also allows you to create intermediate steps while you're editing. You can go back to it at any time. The snapshots are like milestones in your History Panel.
There are various ways to use this function. You can either make all your edits and save them as a Snapshot, then reset and start again to make different edits, which you can save as a new Snapshot.
Another way to use this is to work with its intermediate steps, begin edits, and then create new ones for a different look and go back and forth between them.
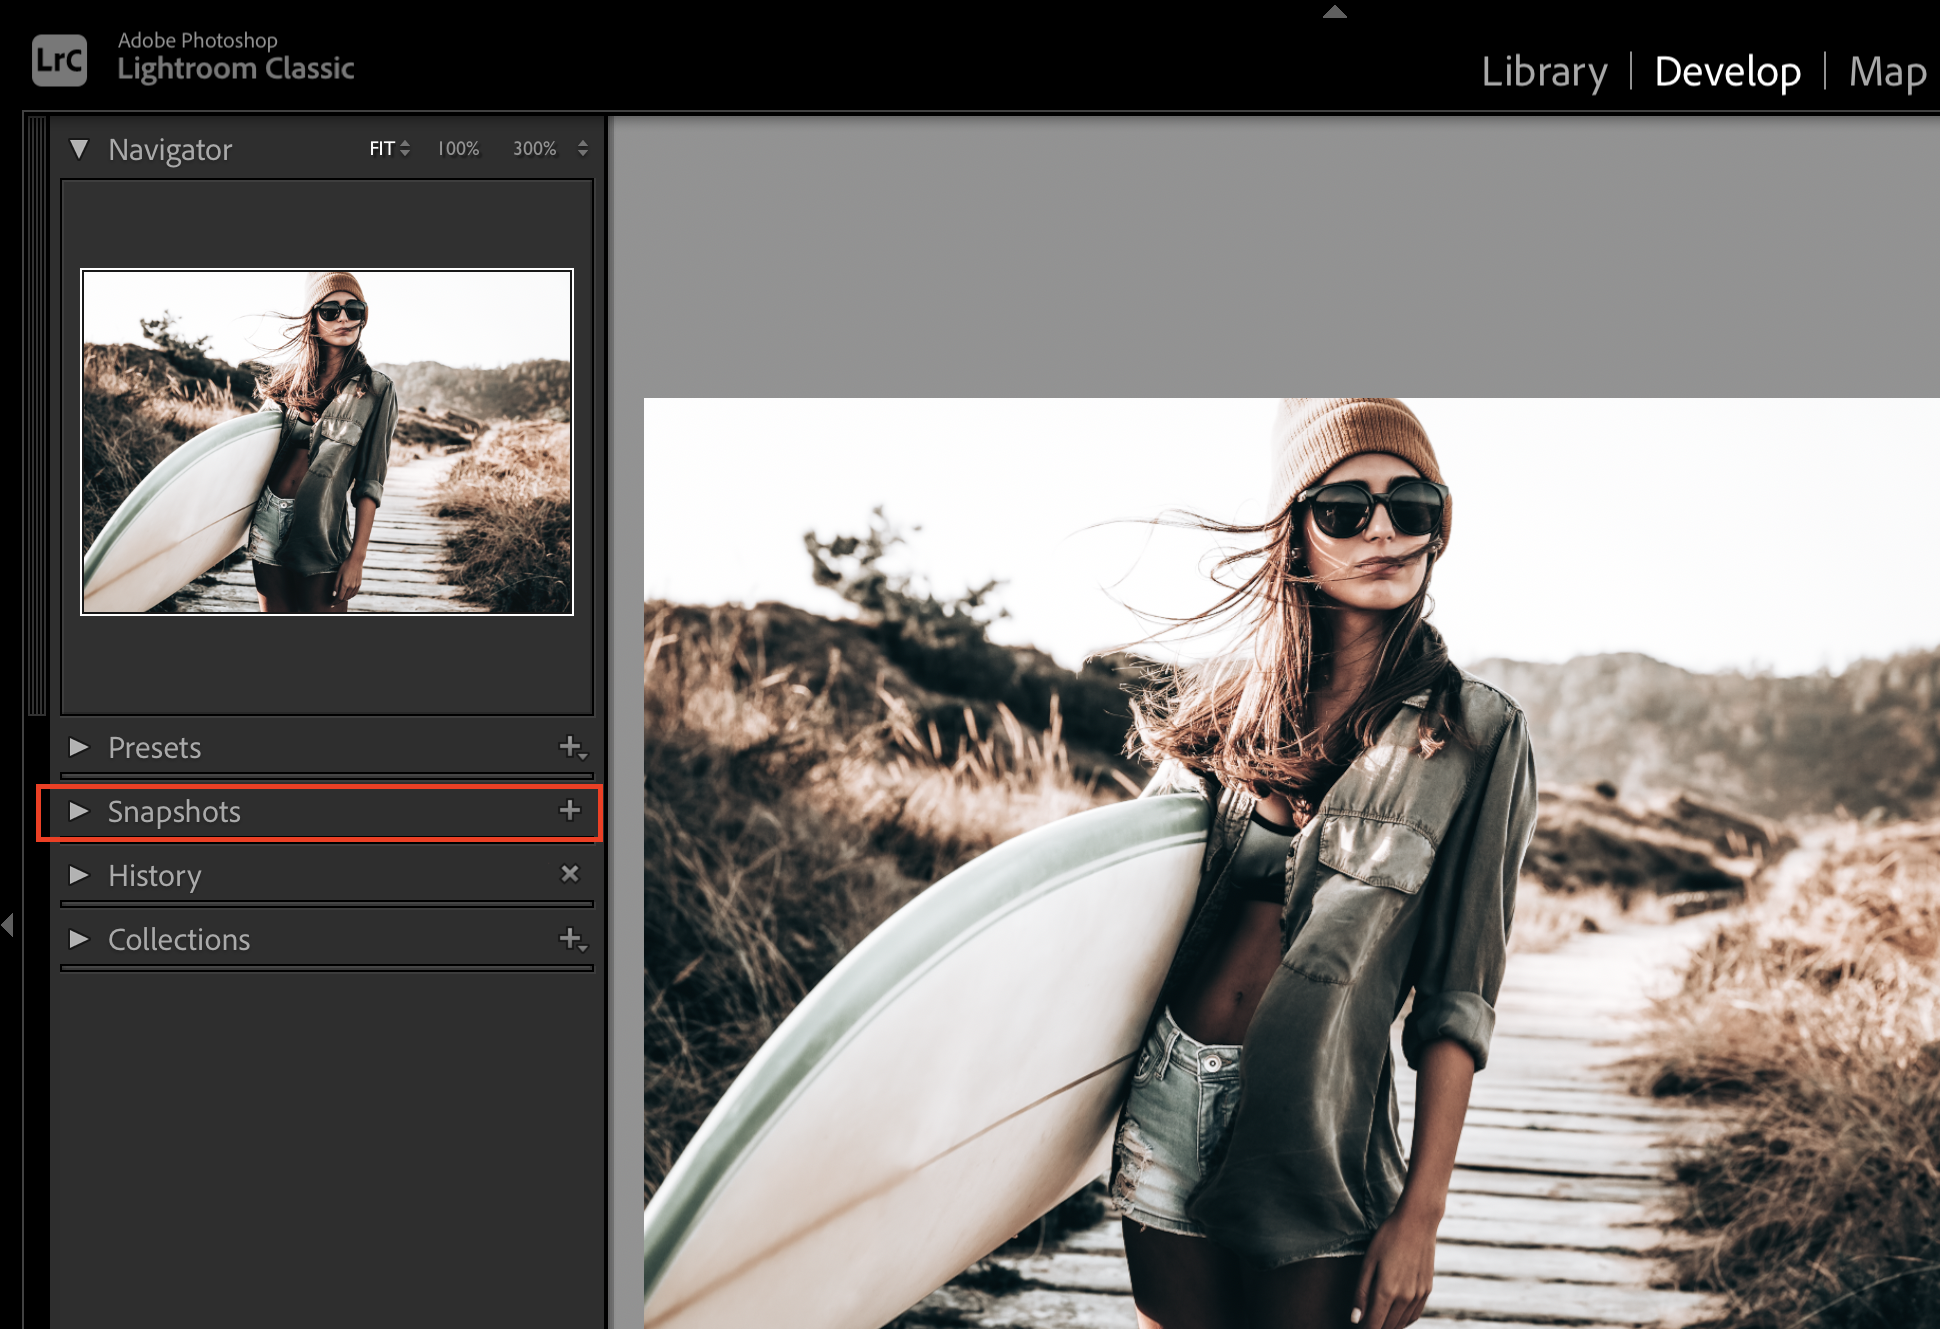
Here's how to create a Snapshot:
The Snapshot Panel is on the Develop Module's left side.
You can save your editing steps at any point during your editing process as a Snapshot and return to it whenever you want.
3. Duplicating On Export
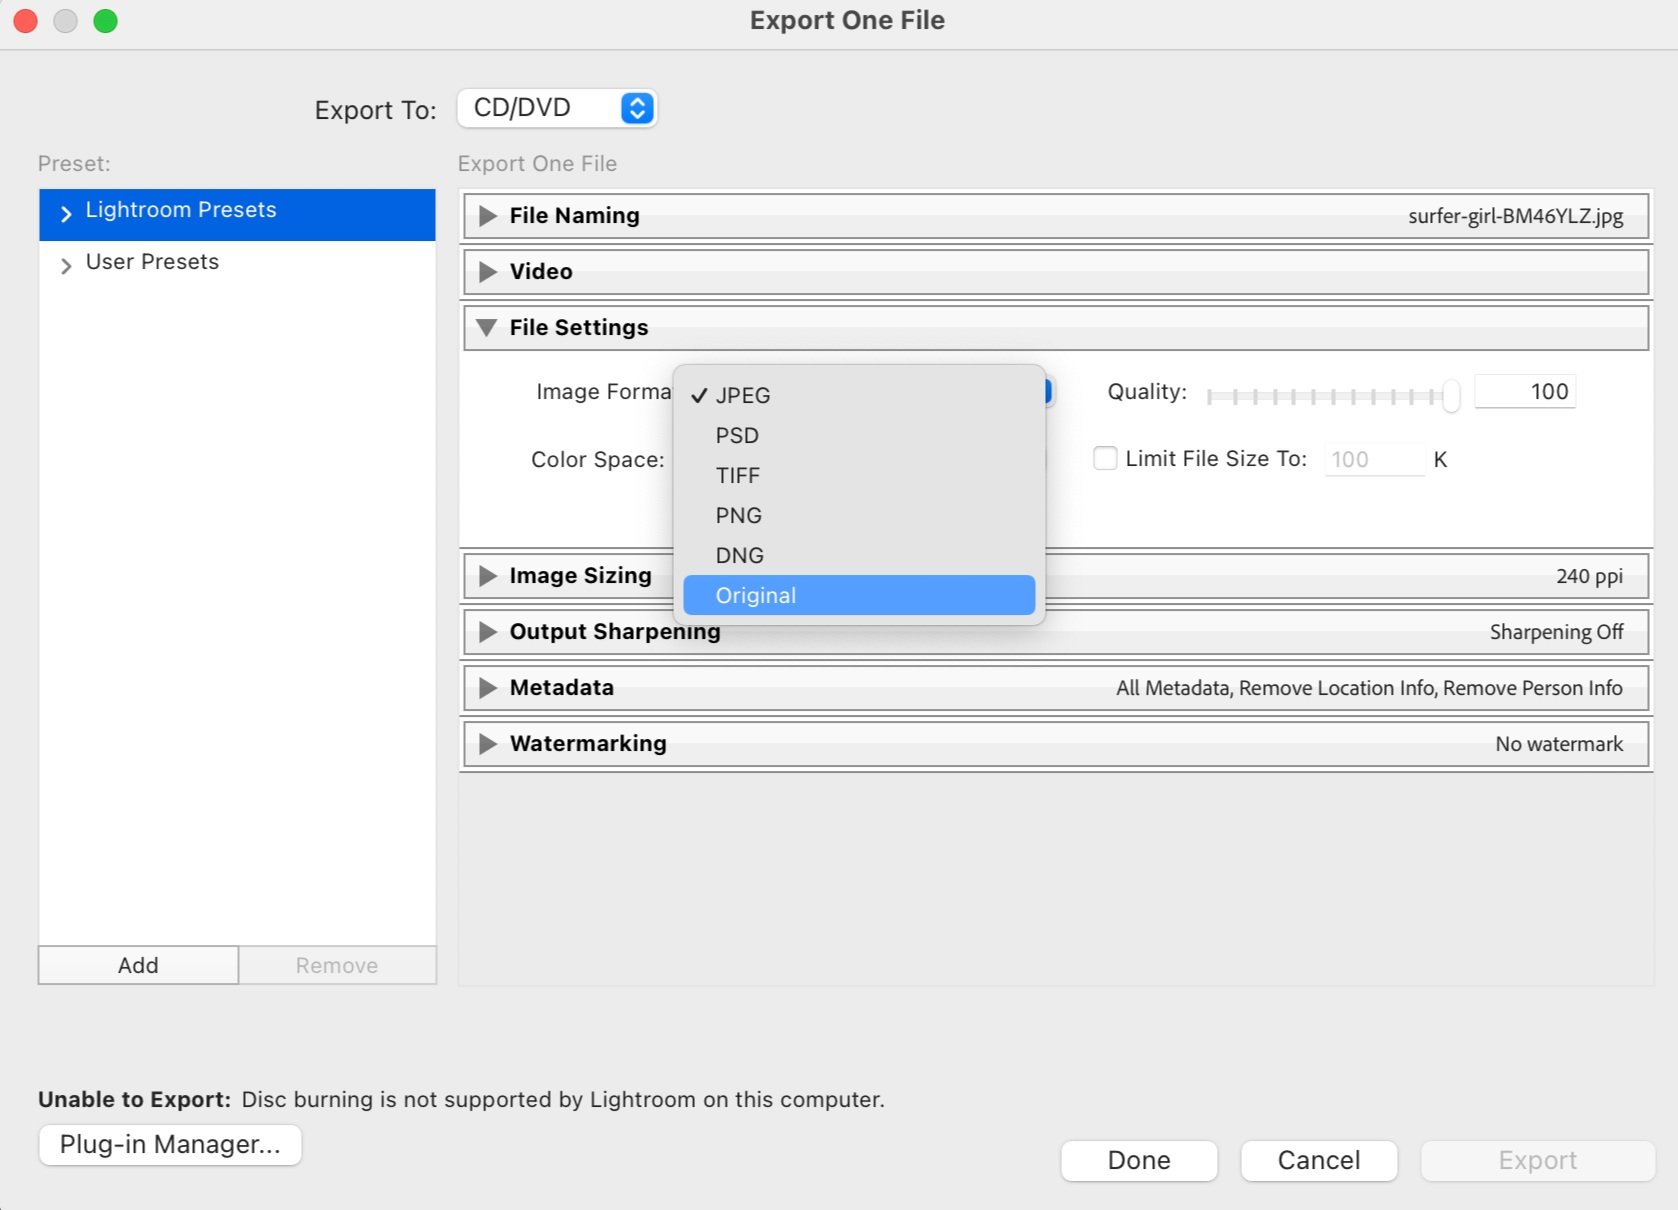
The third way of duplicating an image in Lightroom - if you want to reproduce the original image - is to do it using the Export command.
Select the Original option from the File Settings area in the Export Module.
Click on the Export Button to duplicate the original.
Conclusion
And there you have it! Three ways to duplicate an image in Lightroom. The Virtual Copy and Snapshot methods use Lightroom's unique functionality of nondestructive editing.
They allow the original image file to remain untouched while creating new versions that include your edits. The third method of duplicating an image duplicates the original file on export.


