How to Create a Professional-looking Slideshow with Lightroom!
Did you know that you can create some relatively professional-looking slideshows in Lightroom?
You can add details such as background music and text overlays.
Export the slideshow as a video.
Embed it into a website.
Share the slideshow to social media, including YouTube.
Here's how:
1. Photo Selection
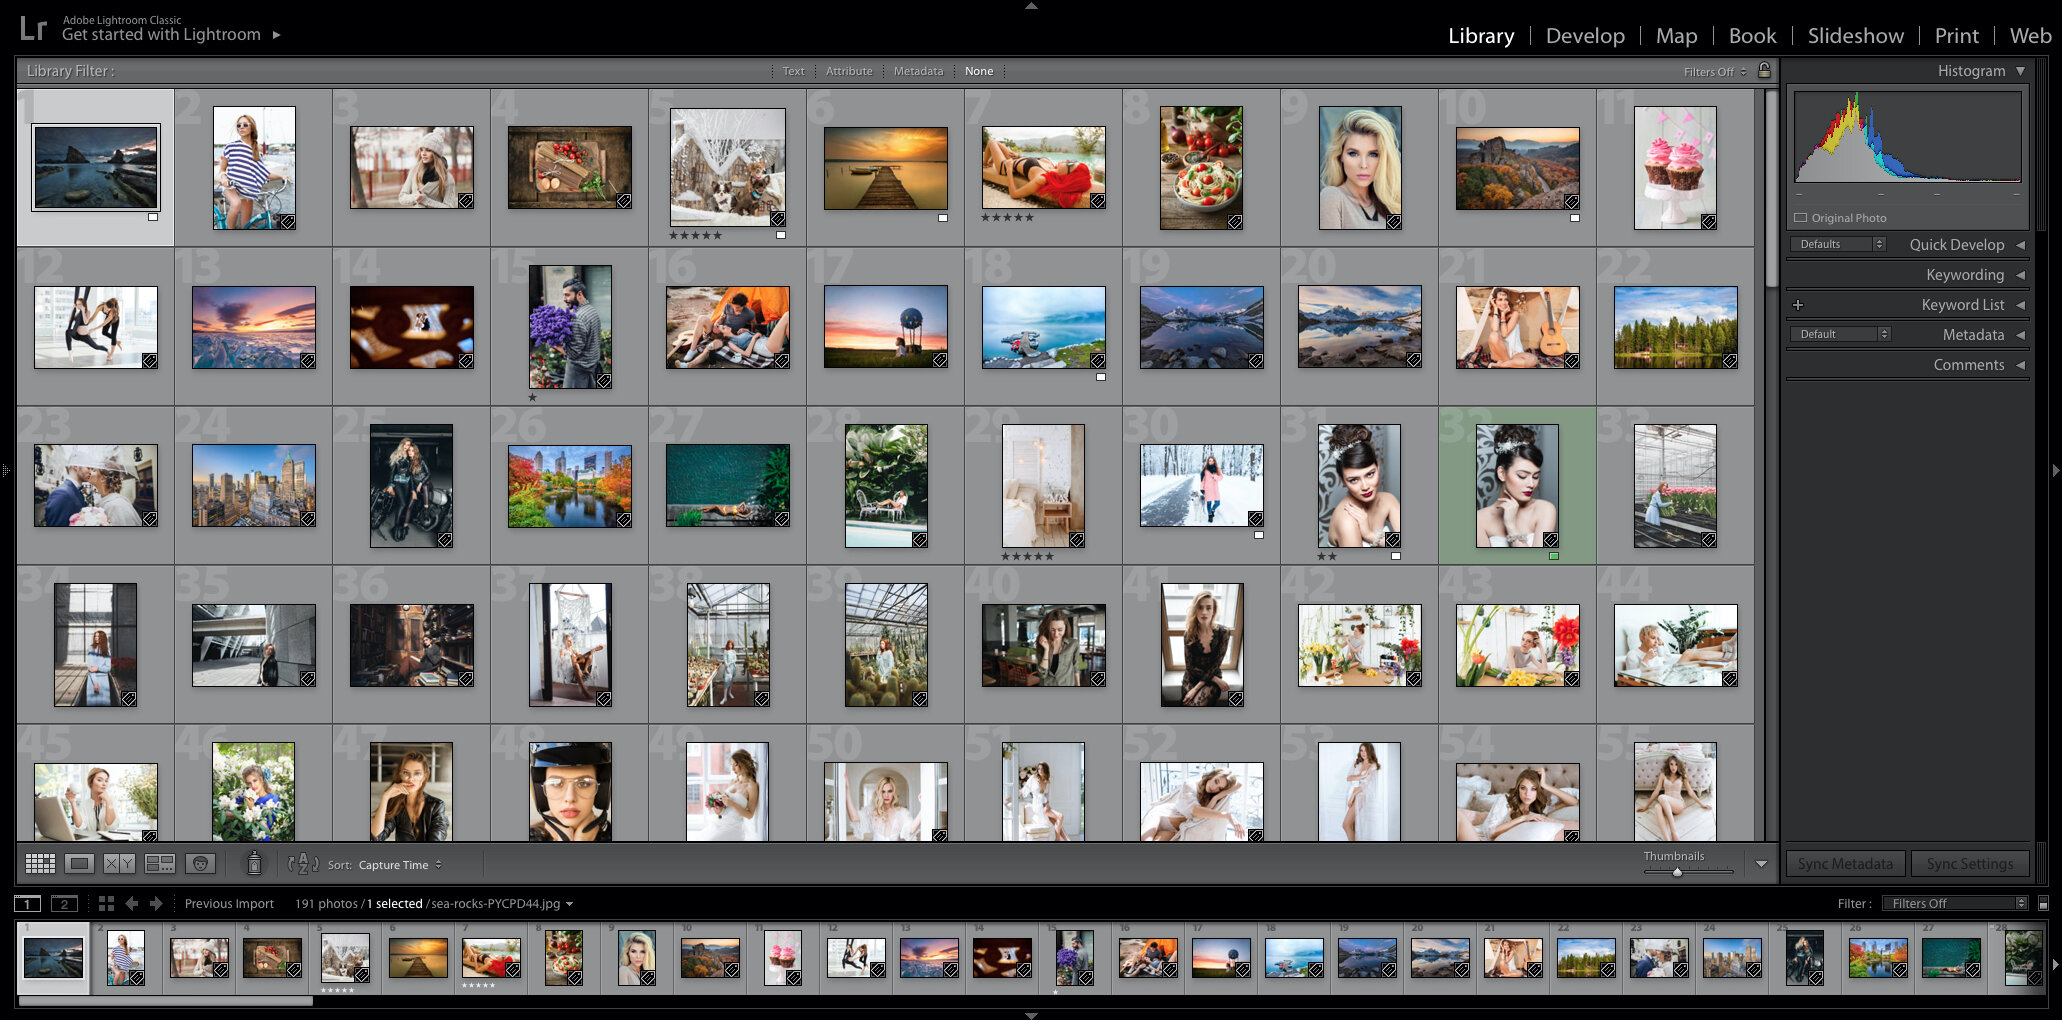
The first thing you must do to create a slideshow is to identify the images you'd like to include. There are several ways to do this in Lightroom. We like to do it through the Library Module.
In the grid view, select the photos you want to use. Hold down Ctrl(Cmd) key and click on each image.
Add those images to a New Collection or a Quick Collection. We prefer the Quick Collection because we think it is the easiest to work with. To add them to Quick Collection, click the 'B' key.
You can make a New Collection later from the photos in your Quick Collection by selecting all the images in your Quick Collection and pressing Ctrl (Cmd) + N to start a New Collection.
Then name the collection for the slideshow, and you'll see it's been added to the Collections panel.
2. Arrange Photos
Now it's time to arrange the photos. You'll need to put them into the same order you want them to appear in your slideshow. To do that, drag and drop each image while in Grid View to where you want it to appear in the slideshow.
Before you do this, however, there are some essential things to consider.
Is there a theme or a specific purpose for the slideshow? If so, take that into account when arranging the order of the images.
Consider the viewing audience.
How long do you want the slideshow?
Do the images need to be in chronological order to make sense to the audience?
Do the color, subjects, and/or composition need to be sequentially?
Do the images flow well together?
3. Create Your Slideshow
Once you've completed step 2, it's time to create your slideshow.
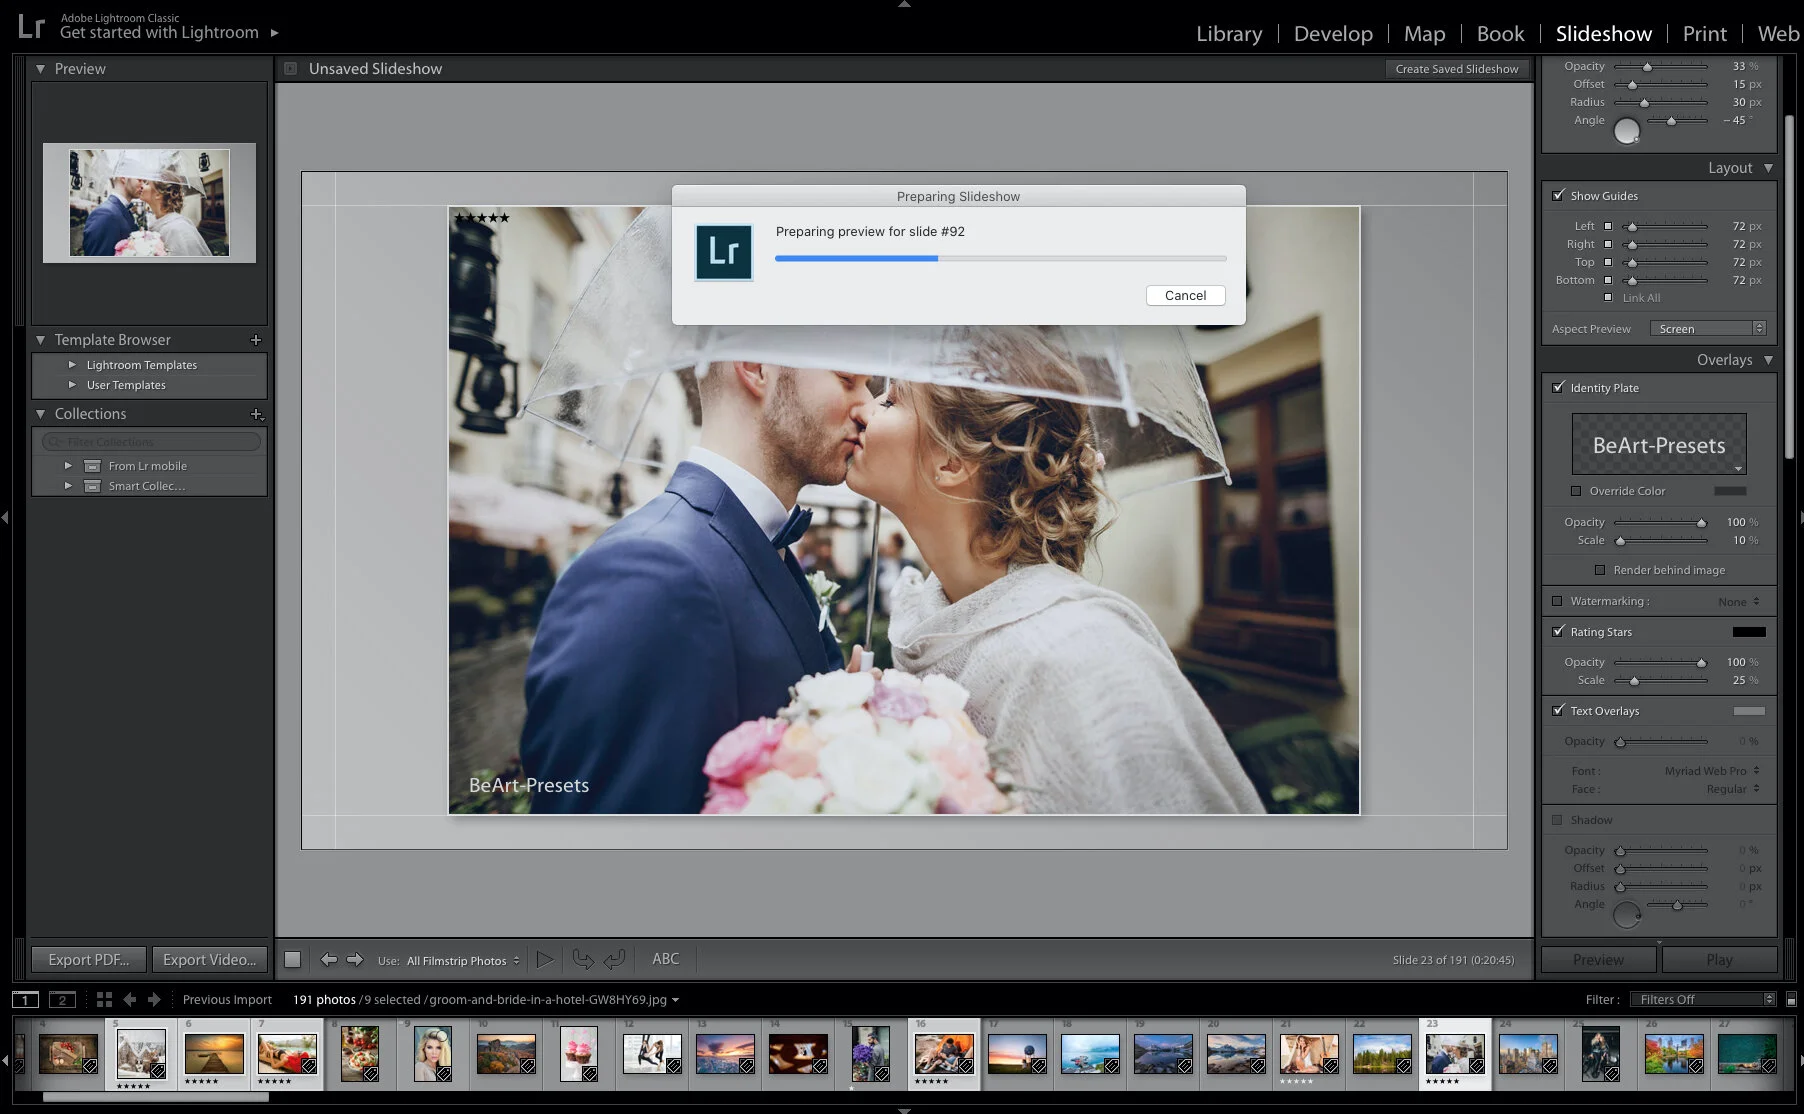
Start by clicking on "Slideshow" in the top menu of your screen.
This opens the Slideshow Module view in Lightroom. You might notice that the right and left panels look different than the ones in the Library Module. (If they don't appear, press the F7 and F8 keys.)
Click on "Create Saved Slideshow" at the top right of the central panel.
Add a name to your slideshow and click on Create.
Once you've made/named your slideshow, all changes will be saved automatically in Lightroom.
4. Select a Template
Now it's time to select a template for your slideshow from the Template Browser in the left-hand side panel. It's a good idea to use a preset template because it will make it easier to make any changes later.) Do a run-through on your slideshow now to see how it looks before you begin adding enhancements.
5. Designing Lightroom slideshows
It's time to customise your slideshow and make it look more professional. Using features in the right-hand side panel, you can make the following changes or enhancements:
Titles: Most slideshows will need some text, and you can do that easily in Lightroom. You can also add a company logo, introduction, and other information.
Overlays/Watermarks: Using the Overlays window, you can add details such as watermarks or custom overlay text to individual slides. To add custom overlay text, click the ABC, which you can find below the main window. Type in the new text, then drag the text box to whatever position you want on the slide. You can resize the text by using the box handles.
Layout: The program automatically sets the spacing for each slide, but you can change that. You can adjust the space for each side, by unchecking the Link All box and selecting the aspect ratio you prefer.
Options: The Options panel allows you to select how your images are displayed in each slide. For example, you can fill a frame, add a border, etc.
Backgrounds: You can create a background for your slides using various options available. Keep in mind that your background should complement or enhance an image, not overpower it or divert attention from it. You can change a solid background into a color wash with a gradient look or even add another image as your background.
Music: You can add music using an mp3 file. Simply upload from your hard drive or another source.
Transitions: Setting the transition between slides can greatly improve the overall experience for your audience. You can adjust the transitions manually or use the auto option. You can also sync the slideshow to the music track you select. This could take some careful revision or edits to get the overall speed and transition that works best for your slideshow.
6. Completion
Once you've made all the enhancements you'd like, you can press "Play" to run the slideshow. At this point, you can still go back and made some final edits or changes. Once you're happy with the results, it's time to export the slideshow as a video or a PDF.
You can upload the video directly to a social media site like YouTube.
If you plan on using the slideshow as a slide presentation, you might want to download it as a PDF.
Click on either of those two options and give your slideshow a name.
That's it! You have now created a slideshow using Lightroom! You'll find that you'll get faster and better at creating them each time you make one!


