Instructions for Putting Your Company's Name or Logo in Lightroom's Top Left
As you know, if you're a Lightroom user, the software displays default text in the upper left corner of its window. You can easily replace that with your own custom text or logo. It's a nice, custom touch.
Changing the default text:
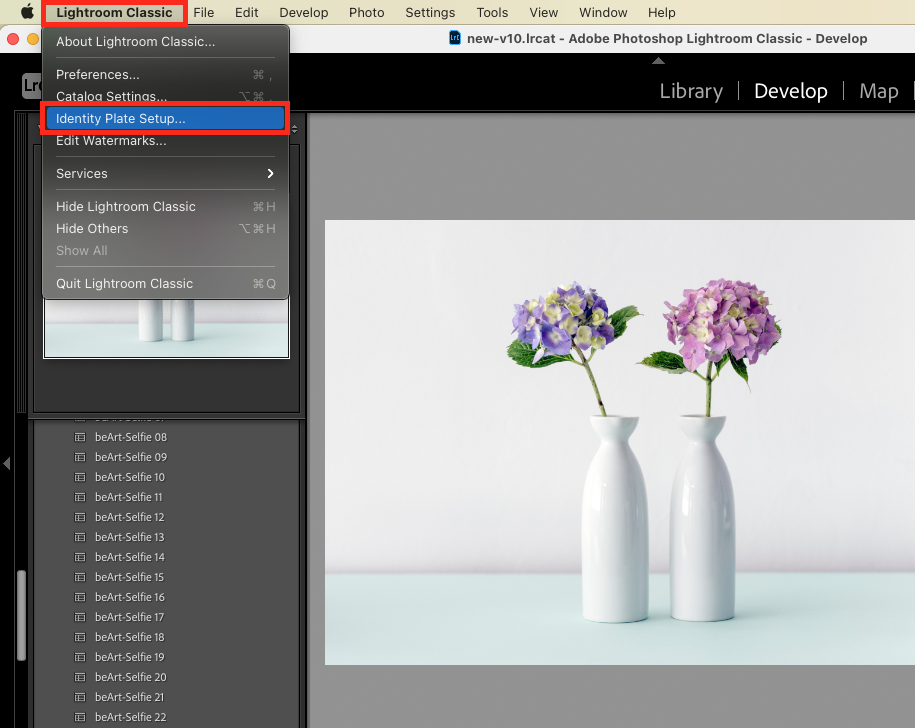
1. On a Mac: In the Lightroom Classic menu, select "Identity Plate Setup." On a Windows PC: It's located in the Edit menu. Go ahead and select it.
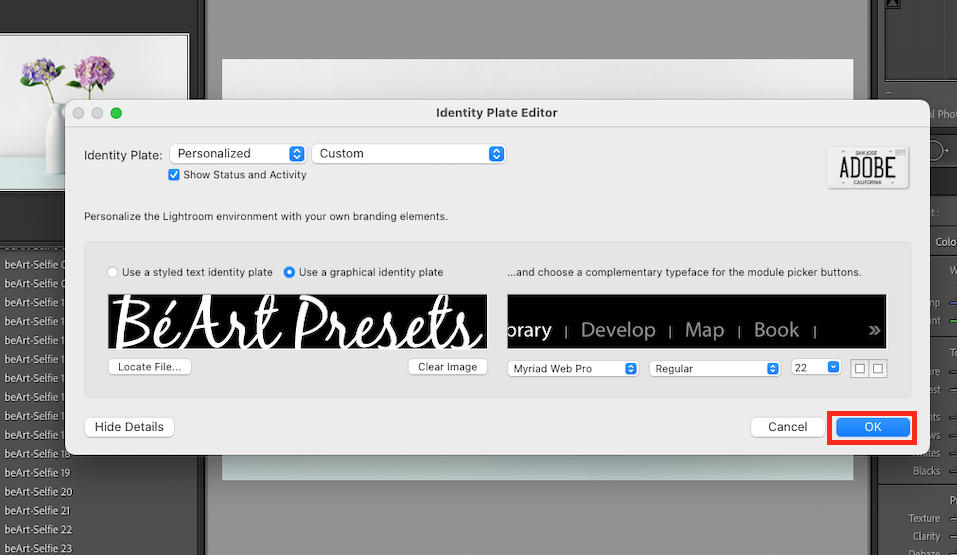
2. Once you've selected the Identity Plate Editor window, in the pop-up menu, select "Personalized."
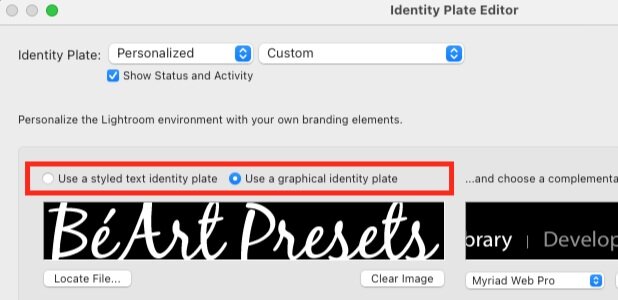
3. Below "Personalized," you will see two choices to replace the Lightroom logo/default text.
You can type in the name of your studio.
To the right of that, you'll see: "Use a graphical identity plate". You can click the "Locate File" button to navigate to your logo on your computer, or drag and drop the logo file into the black rectangle on the left side.
Your logo should not be more than 41 pixels high. You can play around a bit with the width, but it's typically around 175-200. In some cases, you might be able to go a bit wider.
4. Click OK. You should see your logo or text in that upper left corner.
TIP: For a professional look to your logo in the spot, you should upload a logo with a transparent background or a black background identical to Lightroom's black. If your logo doesn't have a transparent background, you can achieve it by uploading it into Photoshop. Put your logo on a transparent layer, delete the background layer, and save the file in .png format to maintain the transparent background.

