A Beginner's Tutorial to Lightroom
We've said it before, but it's so significant that we will keep repeating it - Adobe's Lightroom Classic CC is worth the time it takes to learn it.

We're not saying it takes a long time (although you likely won't master it overnight). Still, it can be intimidating initially.
PART I - Introduced to the basics of Lightroom
If you're serious about your photography, you will be grateful you invested the time to get to know Lightroom. This is why we've put together these comprehensive tips for beginners. We've broken up our tips into three parts, which we will post separately for simplicity.
This first post focuses on the basics of Lightroom. The second will focus on managing and organizing your files. We hope these will help set you on your way to mastering photography's most powerful and popular editing software.

What is Lightroom?
Adobe's Lightroom is a rockstar in the world of photo editing software. You can use it for editing as well as managing image catalogs. Unlike Adobe Photoshop, which was designed for graphic artists, Lightroom was designed specifically for photographers.
A critical feature of Lightroom is that it is non-destructive editing software, which means that it doesn't destroy original files. Instead, it preserves the original file. Once you begin working on an image or images, it creates a "placeholder image." All edits are made to that image and not the original. This allows you to see what your final creation would look like upon saving or exporting - without harming the original.

Shooting Raw Mode
Before we go any further, we need to talk about shooting in RAW mode. Most professional photographers and serious photographers shoot in RAW mode. There are pros and cons to shooting RAW. This mode inevitably produces lower saturation and contrasted images, so why shoot with it? When you shoot in RAW, you can completely control color, curves, saturation, white balance, etc. If you're going to use Lightroom, we suggest you shoot in RAW mode.
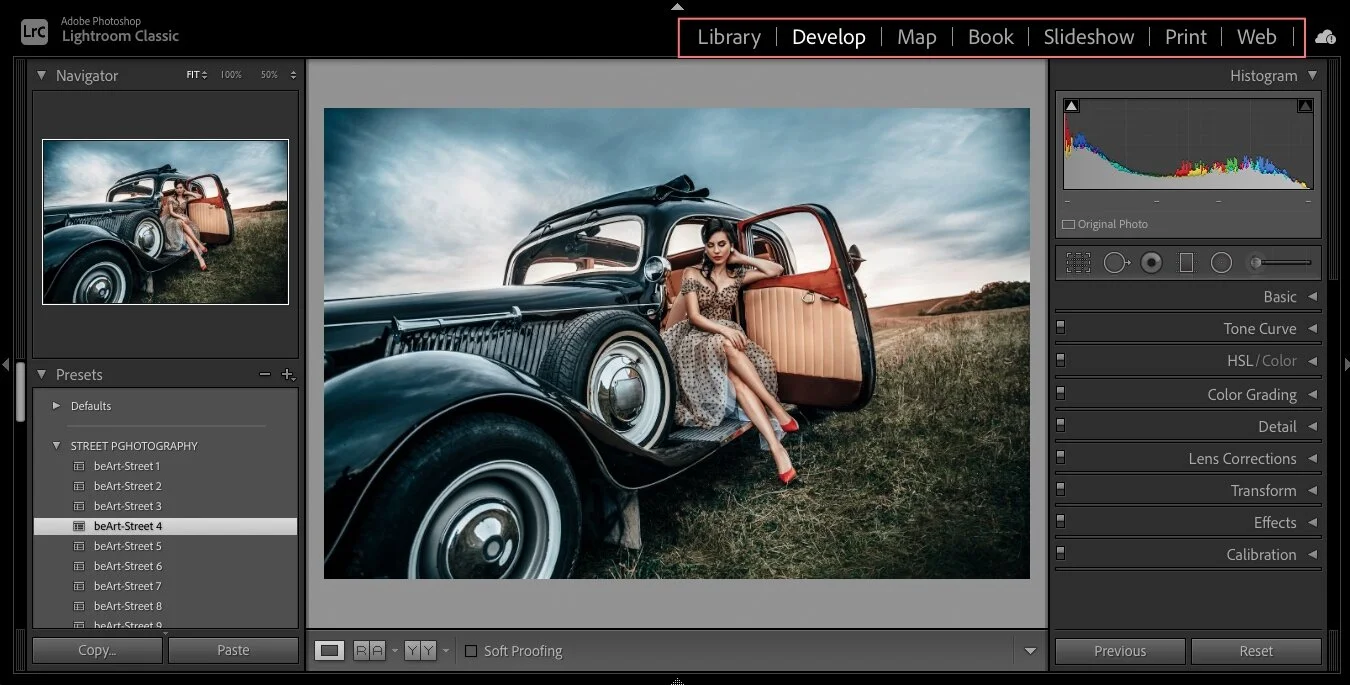
Modules
Modules are where you find various tools and perform tasks, such as the Library, Develop, Map, Book, Slideshow, Print, Web modules. We will focus on the Develop and Library modules for the purposes of this post. It's where you will do most of your Lightroom work. The Library module is where you will import, organize, and manage your images. Develop module is where you will edit and work on them.
Getting started
When you first open Lightroom, it will ask you to create a new catalog for your images and where you want to store the catalog. This is because, as we said, Lightroom does more than just edit. It helps you to organize and manage your files. Since you're just getting started, you can always opt to let the software choose where to store it. If you want to select a destination folder yourself, expand the menu and choose a destination in your computer's hard drive.
Importing
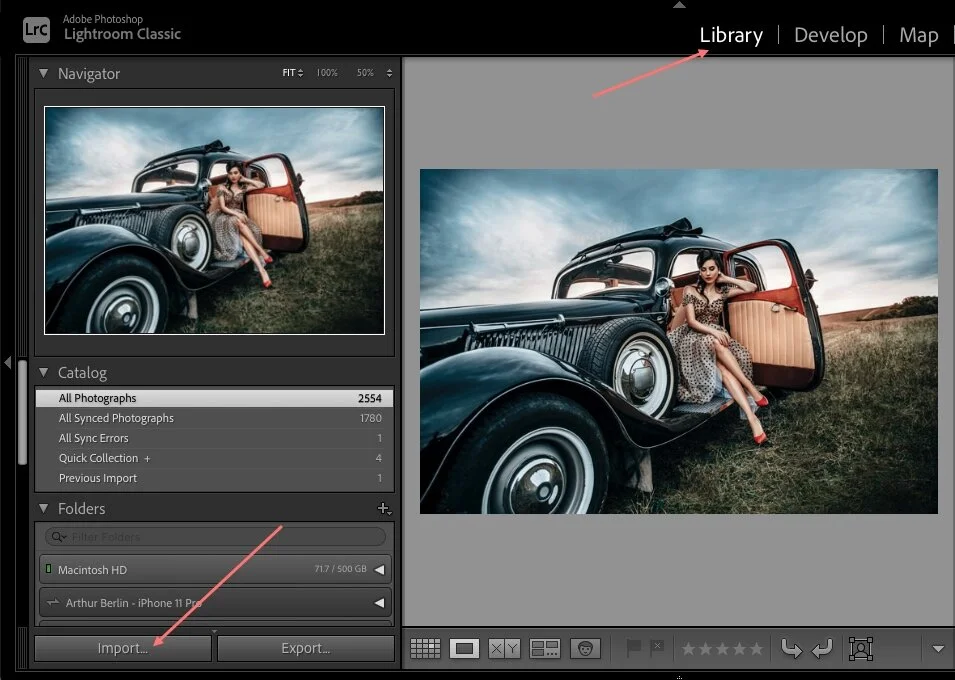
On the bottom left of your screen, you'll see the "Import" button. Click on it.
The next screen is the Import Dialog. Select a source on the left side and click on the folder you want to import (You'll have access to all the image files on your computer, regardless of where they are on there.)
Import Preferences
You can set your import preferences. Look on the right side of the screen. There is a menu that changes according to the type of import you select, so go ahead and choose. There are three types of import preferences: add, move, copy and copy as DNG.
Add* photos means you have copied or moved your files in the right location on your computer's hard drive already.
Move is used when you want to add photos to your Lightroom catalog in the same way as "Add" while also moving images in your computer to another location.
Copy will add to your catalog, and copy the file from its current location to your hard drive. This allows you to copy files from one location to another without deleting them from the original location.
Copy as DNG does the same thing as "Copy" while also converting the file to DNG.
*We suggest that, as a beginner, you use the "Add" as your import preference until you're used to Lightroom.
Naming, Copyright, & Edit Settings
You can rename files while importing them and add a series of pre-defined edit settings, such as sharpening. This can save you a lot of time later during editing. You can also add your photo copyrights in the metadata section.

View
You can select the type of view you'd prefer (Grid or Loupe) at the bottom of the Import dialog. Just check or uncheck all photos, sort them and change the size of the thumbnails.
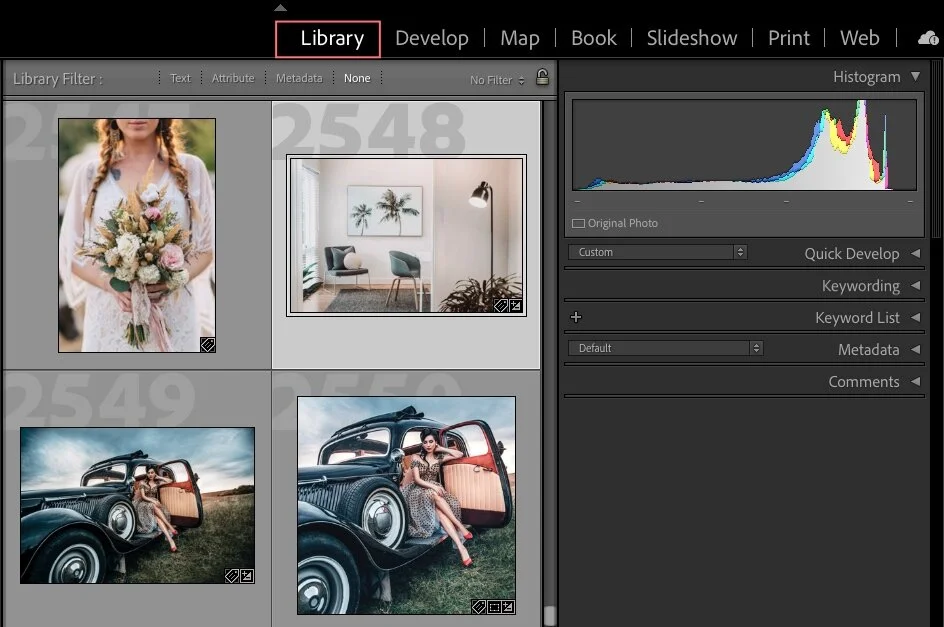
Library Module
After importing, you'll be in the Library Module/Panel. You can now organize your photographs and begin to build catalogs. This is extremely helpful because it's how you manage your files, allowing you to improve your workflow, saving you time. (At the top of the screen, you can switch between different modules.)
You will note that on the left-hand side of your screen, you can see the folder structure. Using the menu, you can add more folders for additional imported files.
The all-important Collections section is in the left-hand menu. You will make it your best friend by the time you've mastered Lightroom!
Then, in the middle of your screen, you will see your images. You can click on the thumbnails to play around with them and organize them. You can add them to any collection, rotate them, flag them, or rate and label them. (More on this further ahead.)
You'll also see a toolbar in that middle section's bottom area that allows you to switch between loupe and grid views. You can compare images or choose a People to View and take advantage of Lightroom's facial recognition algorithm that groups photos of people's faces.
Next, at the bottom of the screen, you will see a miniature version of your images. These are useful to scroll through when you are in loupe mode.
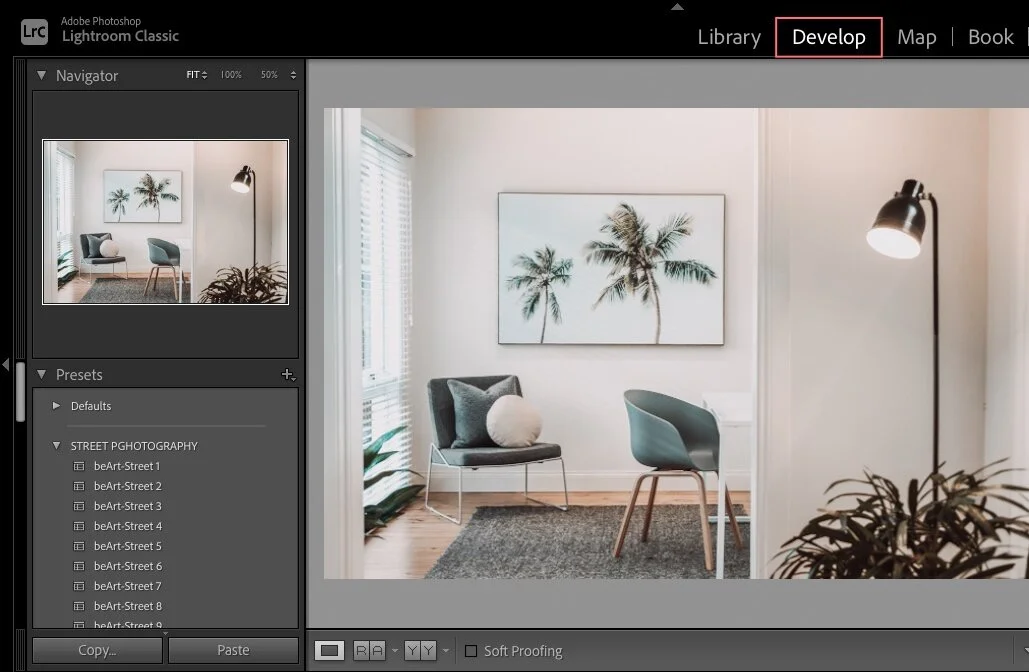
Develop Module
Now that you've imported your images and organized them into collections, it's time to begin the most exciting part - editing. Enter the Develop Module! Consider it like an artist's studio. It's where you can have some fun and transform your images.
Let's start with the left-hand side of your screen. There you will see that you can control things the following features:
Presets are pre-defined or predetermined edits that you can save and re-use with your images during post-processing. They can save you an enormous amount of time. You can make edits to one image then apply those same edits to another image or a batch of images simultaneously. However, Lightroom Presets are only used for images with similar exposure and settings.
Snapshots: You can preserve a group of settings you were using.
History: In the History menu, there is a list of snapshots Lightroom takes each time you make an edit to your image. This is very handy because it allows you to track all of your edits and navigate back through them.
Collections: It these great to have access to your Collections in the Develop Module as well!
On the right-hand side of your screen, you will see the post-processing set of menus. You will spend most of your editing time here. This is what you have:
Histogram: This might look familiar to you. It's a graph representation of the image's tonal value. You'll also be able to see the camera's settings.
Local Adjustment menu: If you only want to edit certain parts of the image, this is very handy. It allows you to preserve unaffected areas of the image you're not editing.
Basic. Here are Lightroom's global adjustment sliders useful for initial basic edits: Exposure, Contrast, Temperature, etc.

This brings us to the end of this Part One. Look for our next post: Managing and Organizing Lightroom files.
PART II - Managing and Organizing Lightroom files
Welcome to Part Two of our Beginner's Tutorial to Lightroom: Organizing and Managing Your Files. Part One introduced you to the basics of Lightroom. Today's post discusses how to manage the catalog, which is an essential part of your Lightroom workflow.
If you haven't read part one on the basics of Lightroom, you might want to read that post first. Some of what we cover here might be easier to understand by reading that first, including how modules and collections work. You can significantly improve how much time you spend on your workflow by efficiently using the Lightroom catalog to organize your images and manage them on your computer.

File Storage
We debated whether file storage should be included in part one or two or at all. We've settled on including a brief discussion about file storage, given that part one discussed the basics of Lightroom. In this part, we will discuss file organizing and management.
Storage for your files must be, above all, reliable and easy to access from your computer. Without either of those elements, it's probably shouldn't be used. Imagine losing thousands of images or being unable to access your files easily.
External Drives: Ideally, most photographers rely on an external drive for storage rather than taking up valuable space on their computer.
We recommend having at least one portable external hard drive.
While there are several reliable and affordable brands on the market, we suggest Seagate.
For a more professional option from Seagate, you might consider a NAS device. They connect directly to your router, and some allow remote access. Consider Synology Disk Station.
If at all within your budget, we suggest using one as your primary and one for a backup copy. Never go without a backup to all your files!
A slightly more expensive but robust and professional solution is buying a NAS.
Cloud Storage: Another option for storage is cloud-based storage. Obviously, you will need a reliable and fast Internet connection because RAW files are large, and backing them up can take time. Some of the best cloud storage on the market today are Google Drive, Dropbox, and Amazon Photos.
Folder Structure
How you organize your folders is obviously a very personal decision. Every photographer has their own system. However, the more detailed you are naming and organizing your folders in Lightroom Classic, the easier it will be to work with your images later.

Organizing Photos
Next, we discuss how to organize your images and create a catalog. This is an essential part of your workflow, and you'll want to be meticulous from the beginning.
Catalog: As we've said, Lightroom is a non-destructive photo editing software. You will edit a "placeholder image" that doesn't alter the original one on your computer or your hard drive. This also means that the Lightroom catalog doesn't contain your files. Lightroom treats the catalog as a file that serves as a database where the software stores photos' metadata. As you'll see later on in this post, that is very handy.
When you try to migrate a file to a different location, Lightroom will ask you to move the placeholder in the catalog to a new file location. To do that, you click on the "image" and indicate where to locate the file. (At this point, you can also ask Lightroom to find the folder.) This sounds complicated, but Lightroom will offer prompts to walk you through the process.
Creating a Catalog: While you had the choice when you first started working with Lightroom to let it decide where to make a catalog, you can also choose for yourself. This allows you more flexibility when it comes to organizing your files. You can create a catalog for various reasons, like individual shoots or topics. By doing it yourself, you also won't lose the reference if you move the folder to a different location. So, whether you create one or more catalogs is an individual choice.
Backup a Catalog: Backing up a catalog is as important as backing up your files. Why? Because your catalog contains the edits, you've made. Lose a catalog, and you lose those edits.
But don't worry. Backing up a catalog is relatively easy to do. Given that Lightroom treats a catalog as a file, it includes the catalog when you back up your files. Also, Lightroom will prompt you once a week to back up your catalogs. Just click to accept, and Lightroom automatically makes a copy to be stored on your computer's hard drive.
Collections: Collections, Collections Sets, and Smart Collections are powerful ways to organize your images. More on the latter two below, so we'll start with Collections.
As you may have already guessed, Collections are a way to group images. However, that's not all it does. You can set images to be a part of various collections (groups) while not using up valuable space on your hard drive. And the handy part of this concept is that if you edit an image, those edits will automatically apply in all of the collections in which it appears - and the original file remains unchanged.
To add images to a Collection, drag a photo into a collection manually. You can also set a collection to be a Target Collection. Right-click on its name, and set it as Target Collection. This allows you to later add an image to that Collection by selecting it in the grid and pressing B on your keyboard.
Collection Set: A Collection can be a part of a Collection Set. This means a grouping of more than one Collection.
Smart Collections: Then there's also something called Smart Collections. These are different than regular Collections because they follow a set of predetermined rules (keywords, date, star, etc.) that tell them to put a photo into a Collection. Also, Lightroom comes with some default Smart Collections.
Quick Collections: You'll find these in the Catalog panel. Quick collections are temporary collections you can keep for a day or two while completing a particular job. You can then right-click on the Collection, then clear its contents or save it.