
Guide to Installing Camera RAW Presets - Photoshop CS6
(.xmp Files)

METHOD 1
To install ACR Camera RAW Presets in Photoshop, please download and unzip the presets you purchased from us and place them in the following location:
Mac(user)/Library/Application Support/Adobe/Camera Raw /Settings
Windows(user)/Application Data/Adobe/Camera Raw/Settings or C:Users-[user name]/AppData/Roaming/Adobe/CameraRaw/Settings
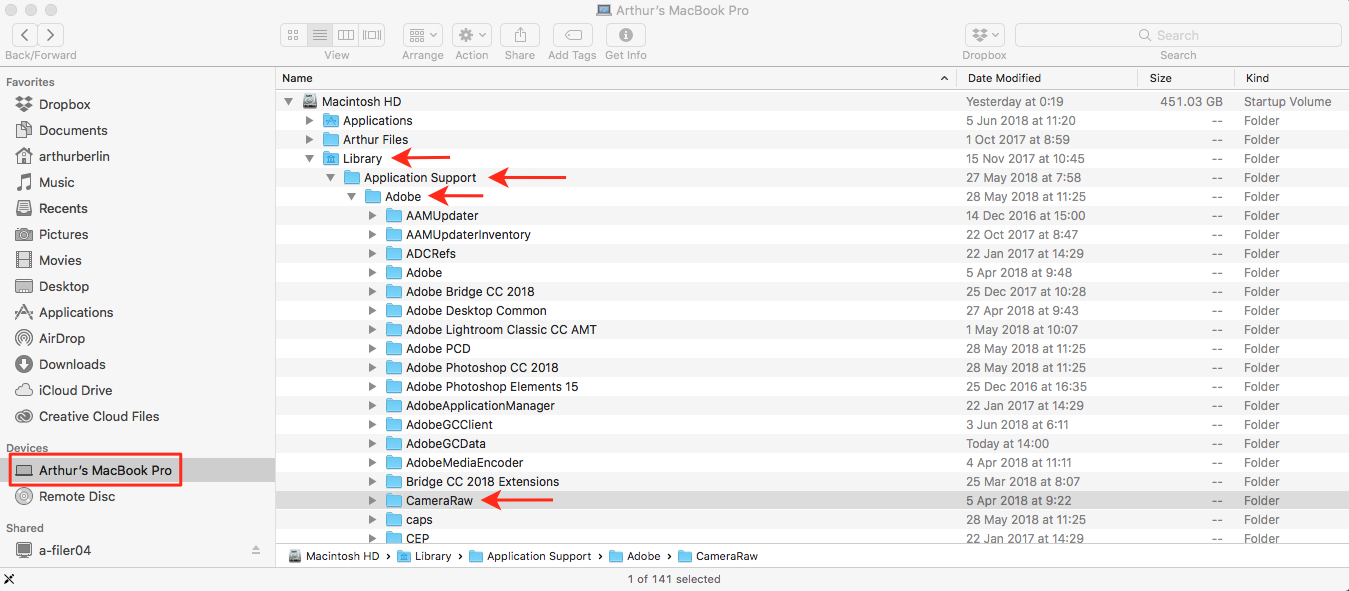
Make sure you only copy the preset files (.xmp) into the 'Settings' folder.

If you are on a Mac, the Library menu may be hidden, depending on your operating system. To reveal it, hold the Option key down while selecting the “Go” menu in the Finder.

If you're still having troubles finding the 'Settings' folder, you can also save a file within ACR (.xmp file in Camera RAW) and search for it on your computer. When found make a shortcut to the 'Settings' folder either in your sidebar or as a desktop shortcut for easy access.

METHOD 2
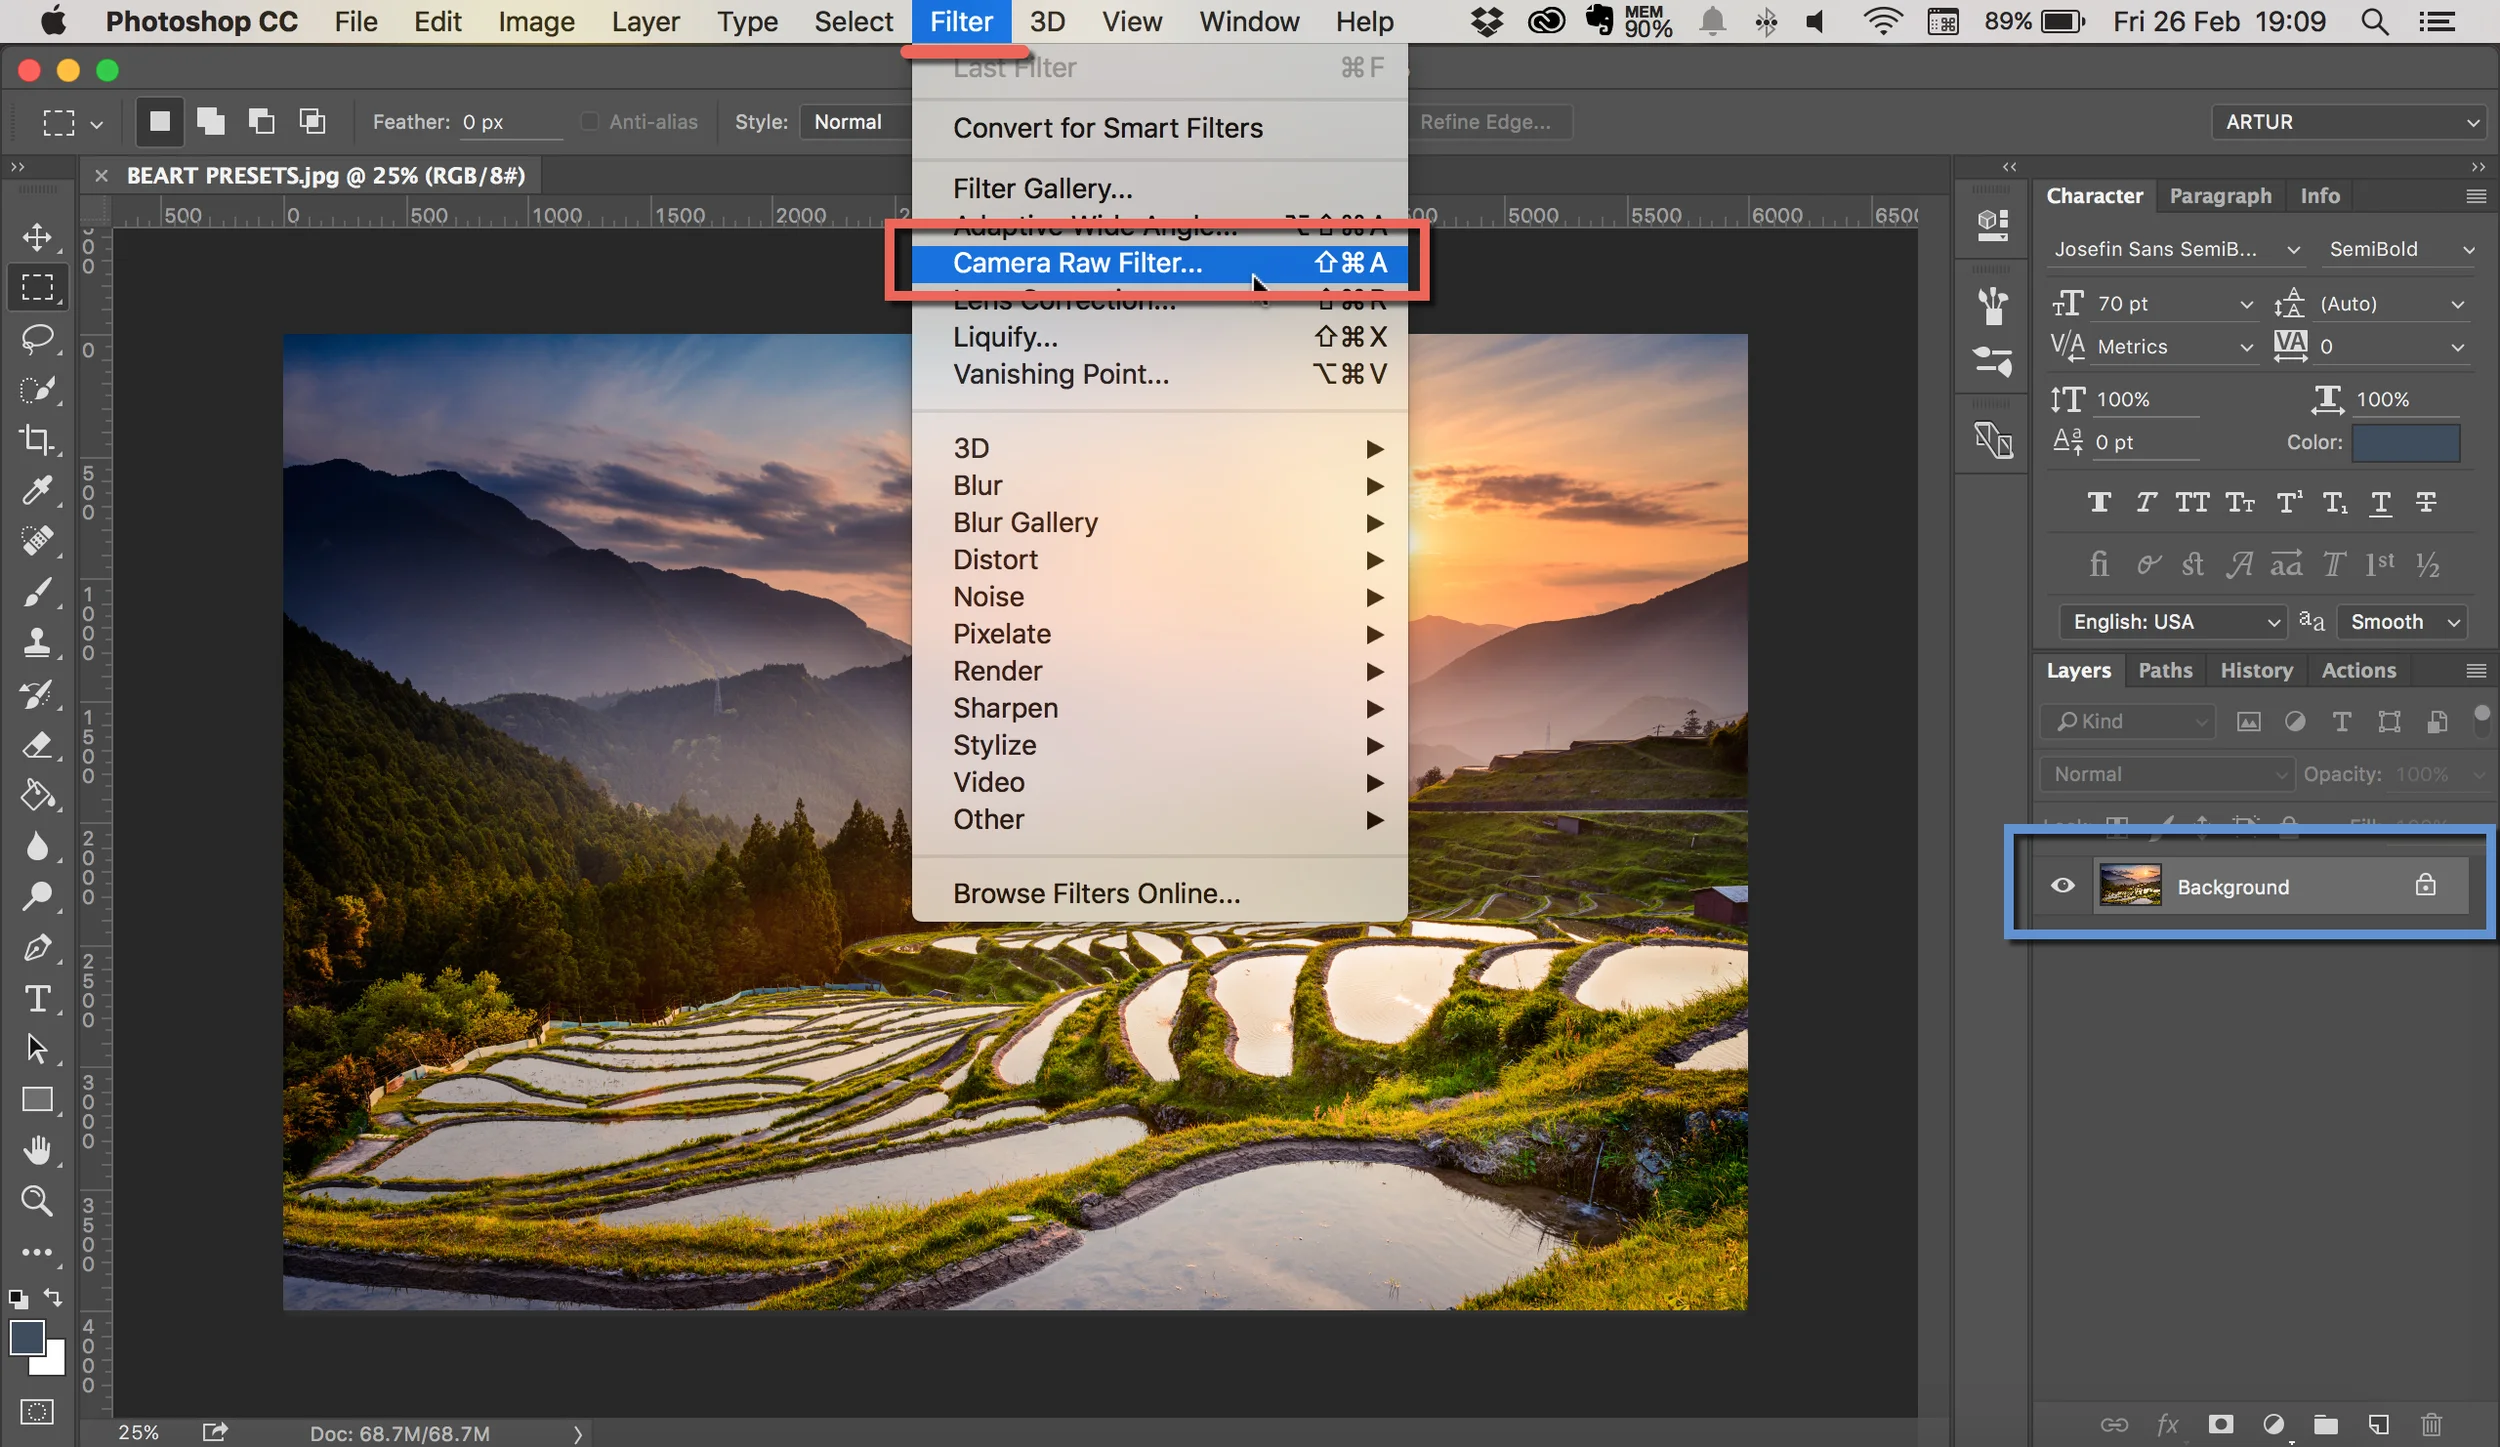
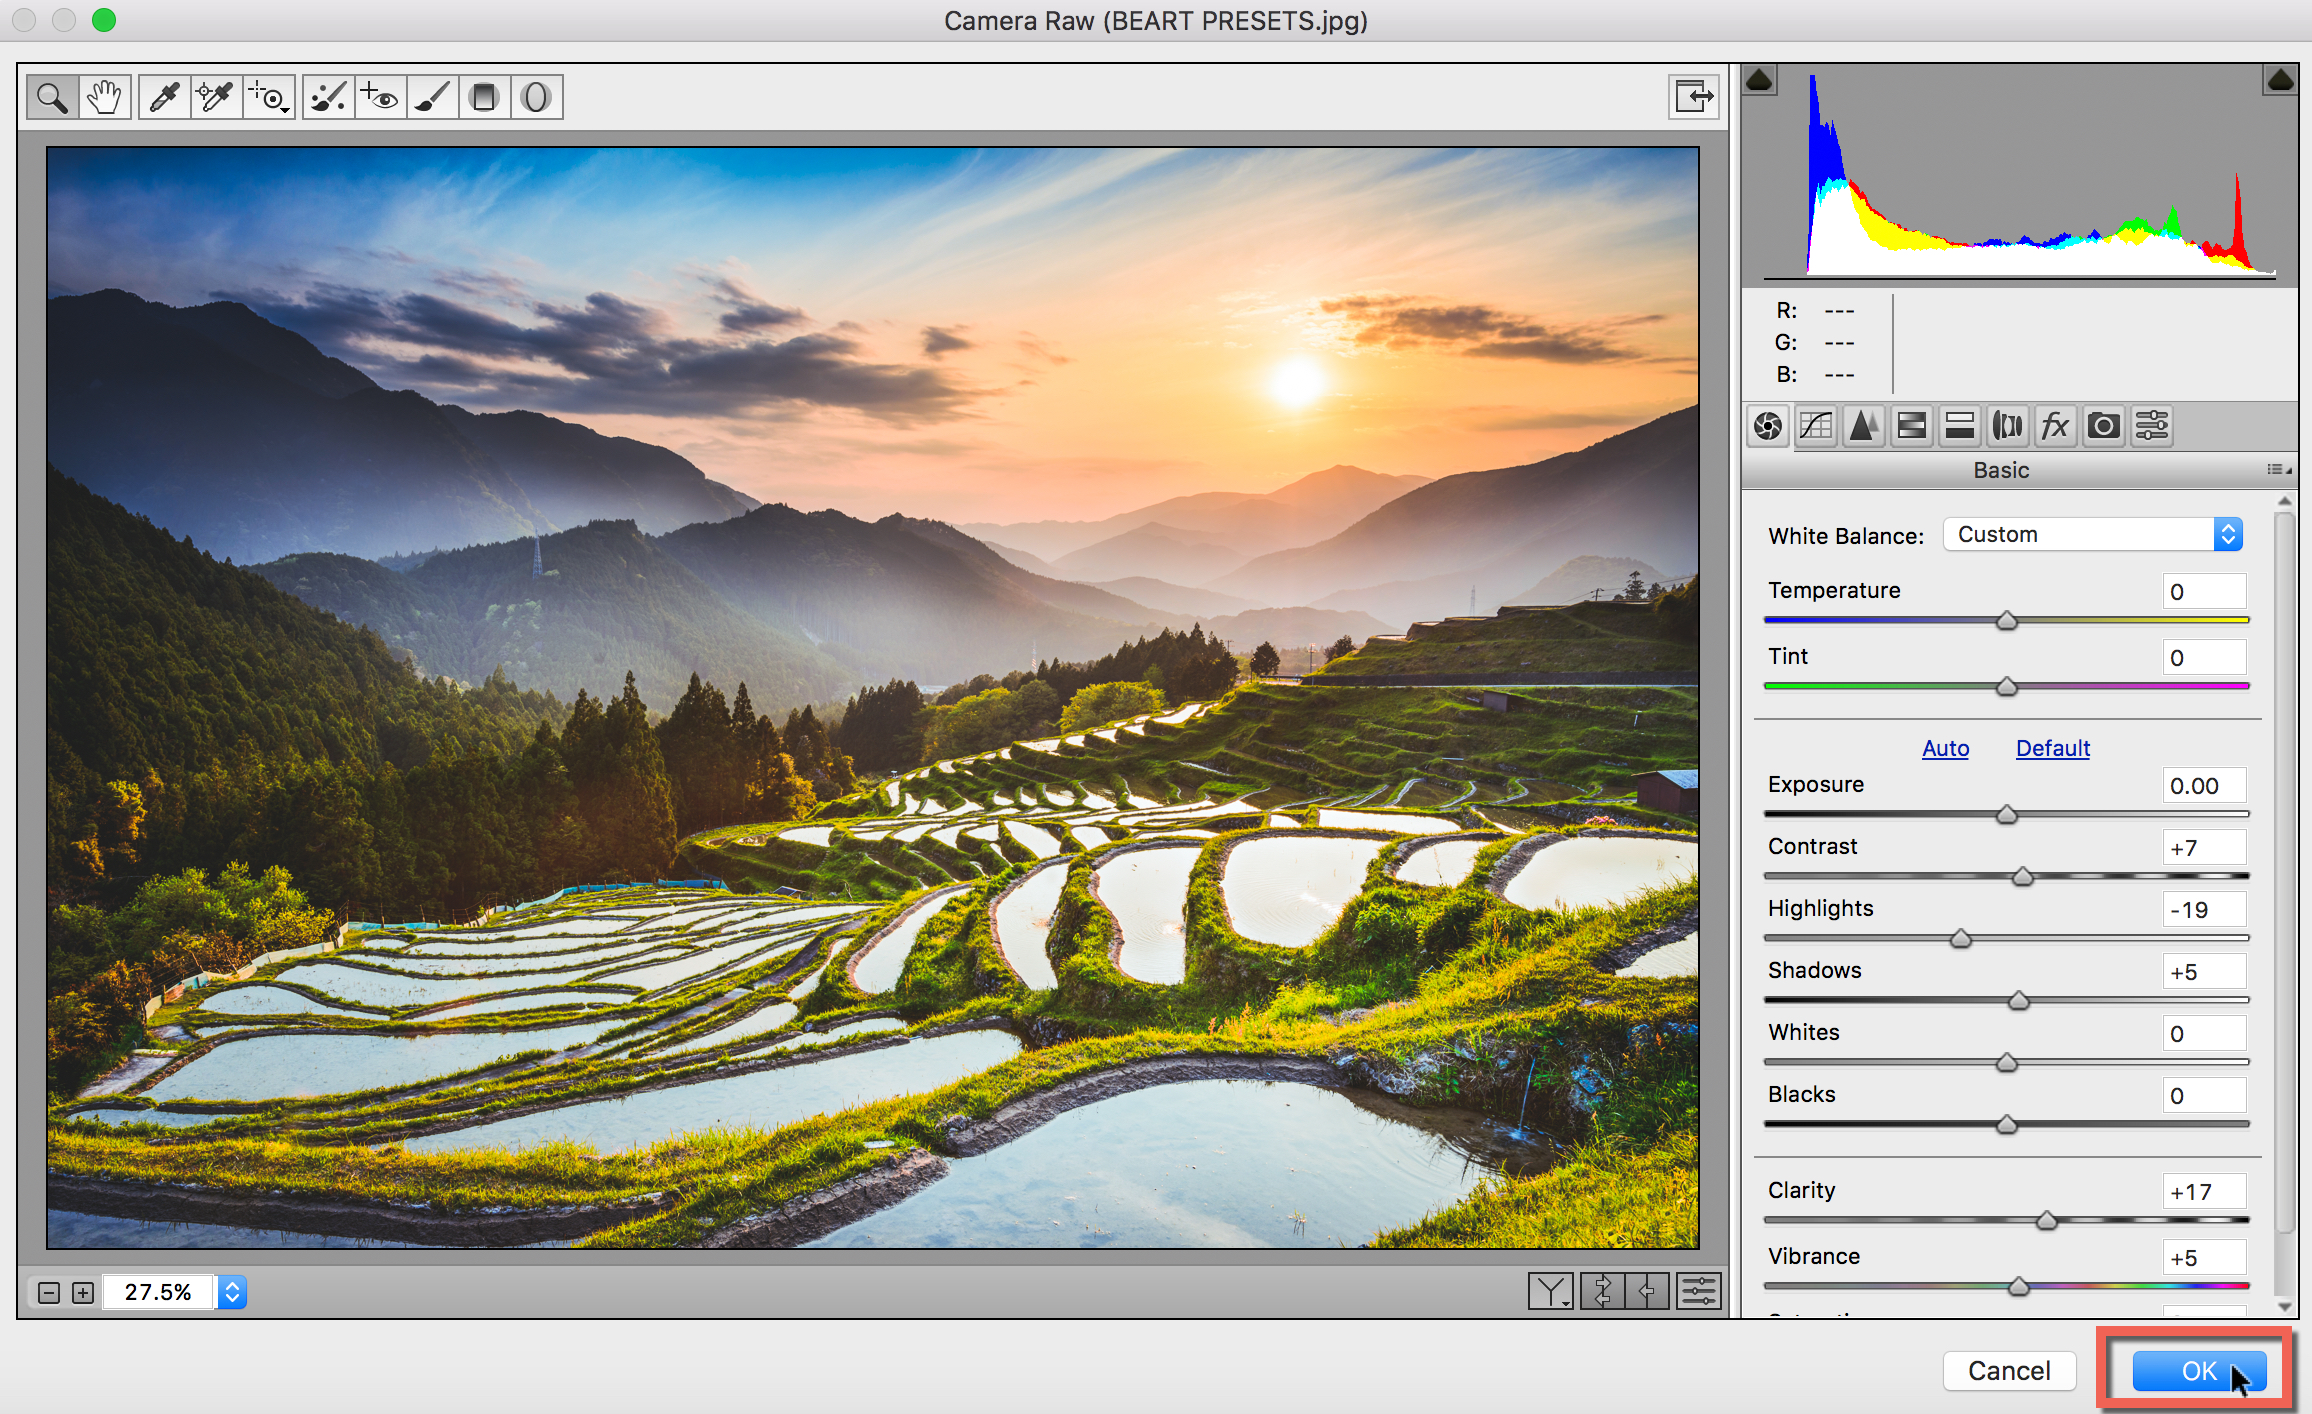
1. Open your image in Photoshop. Click on Filter and choose Camera Raw Filter ...
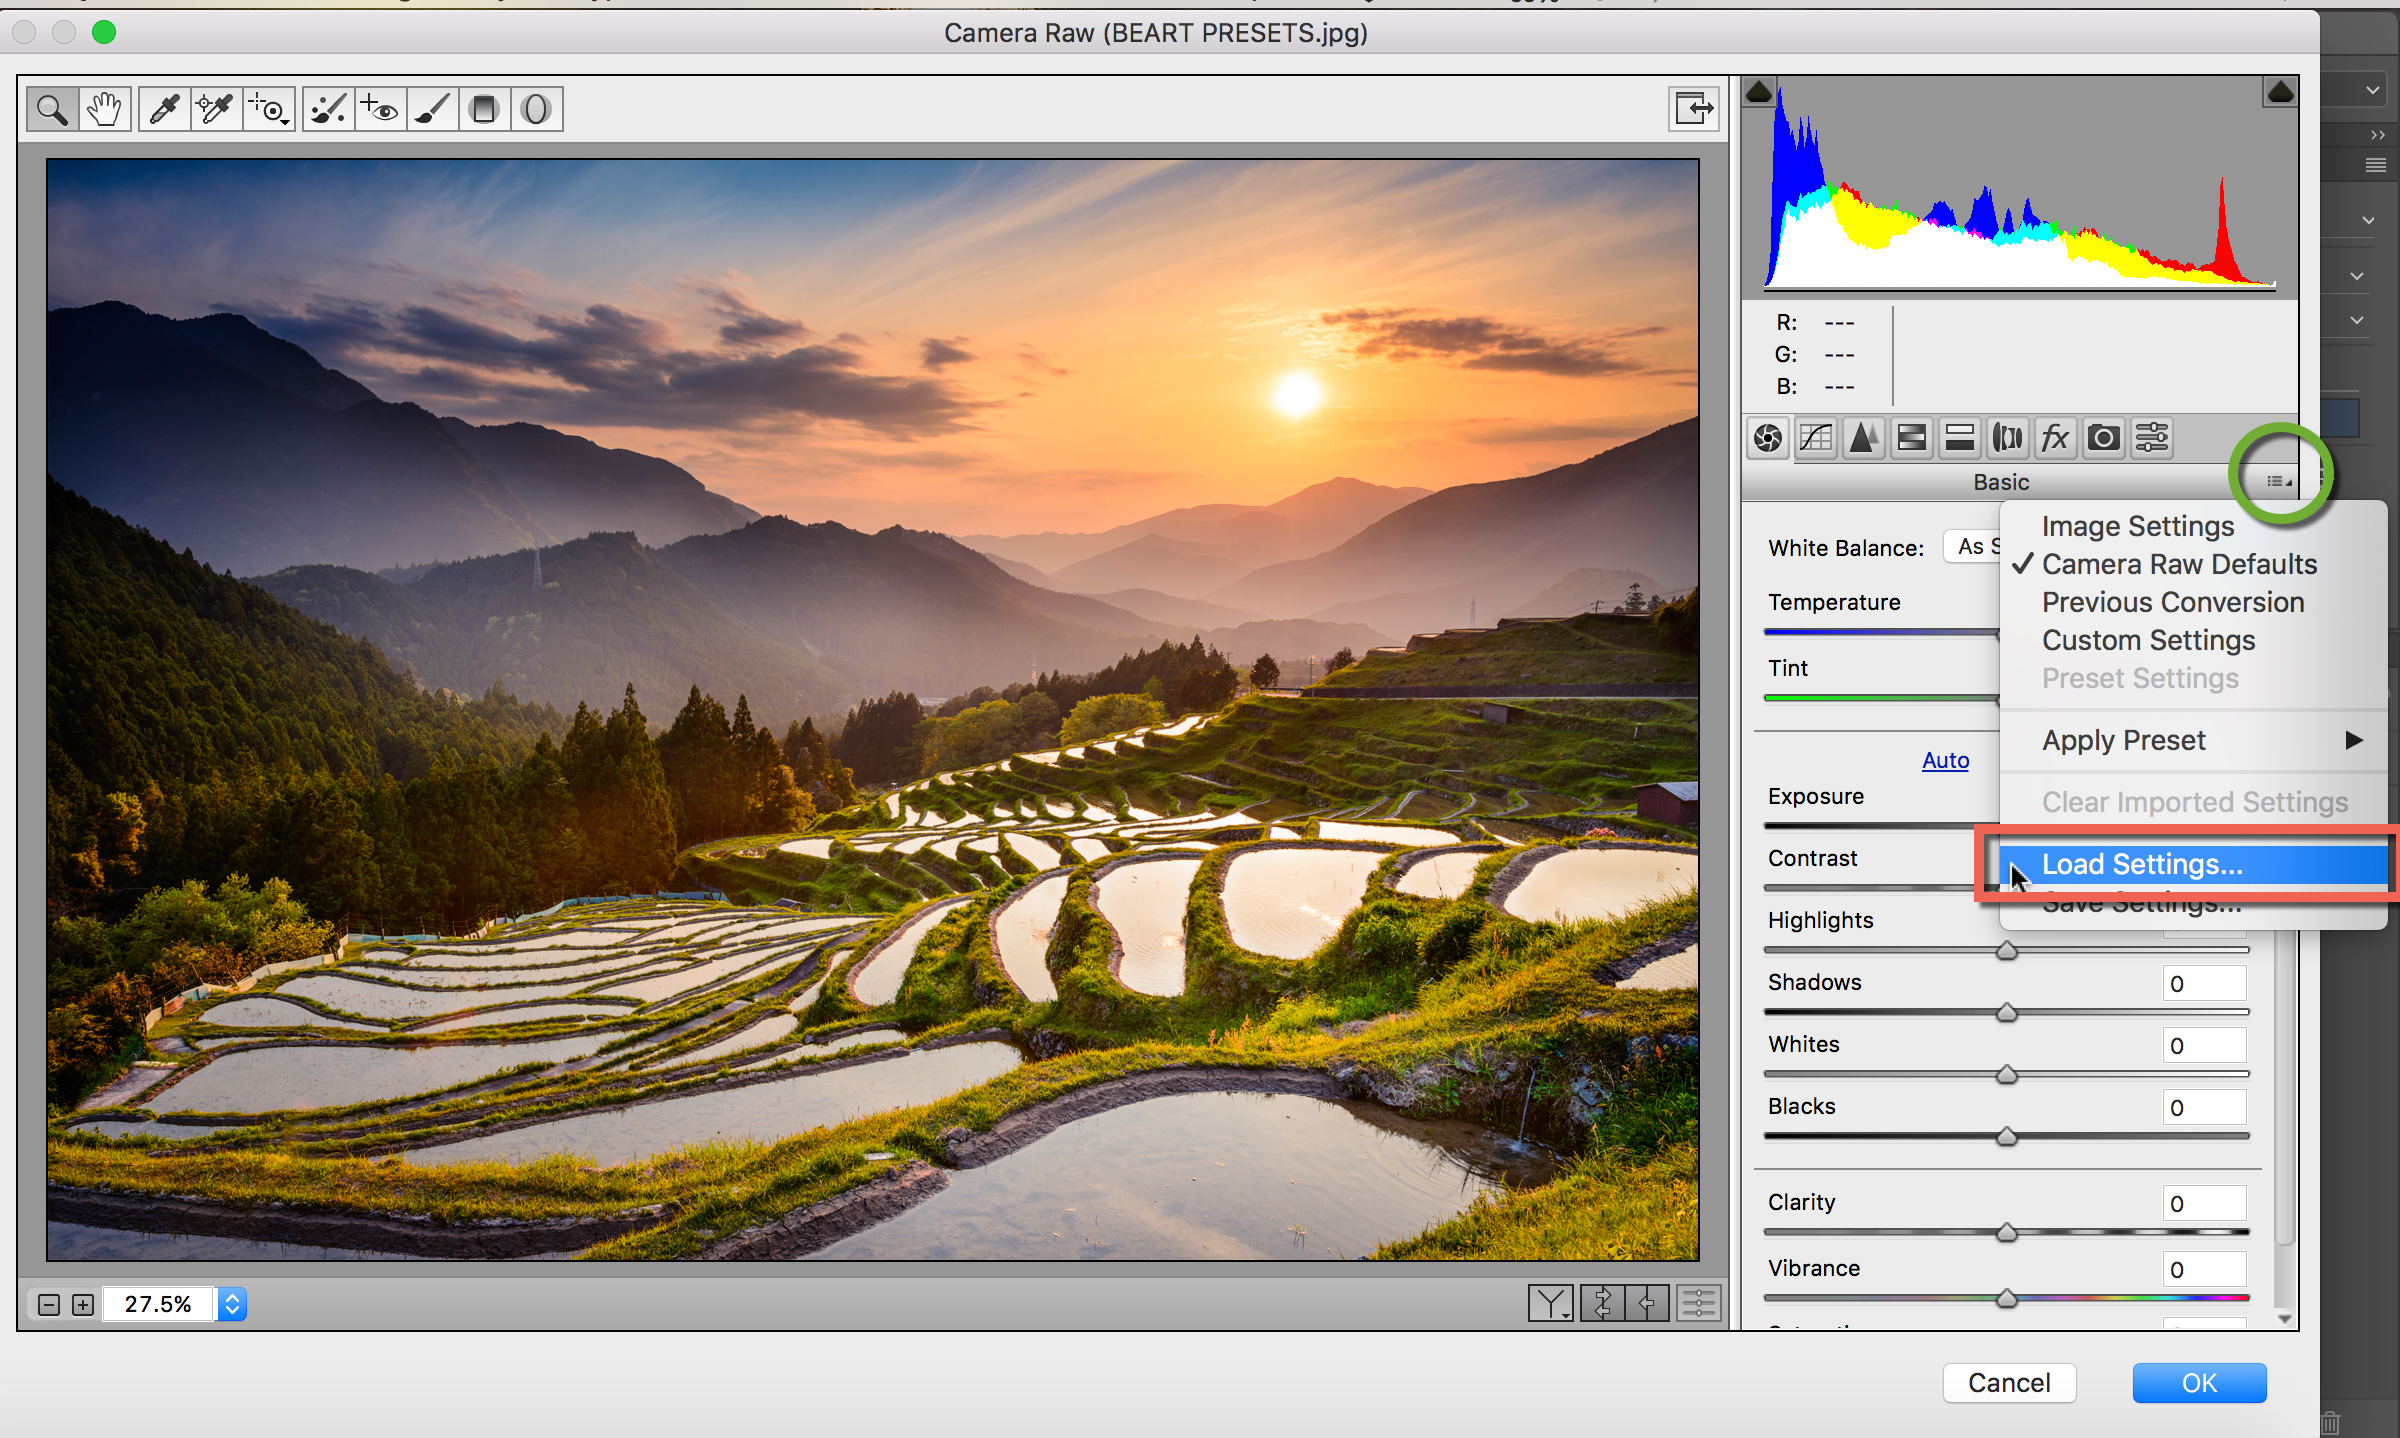
2. Click on the right side of Basic menu (Green Circle). Then, choose Load Settings...
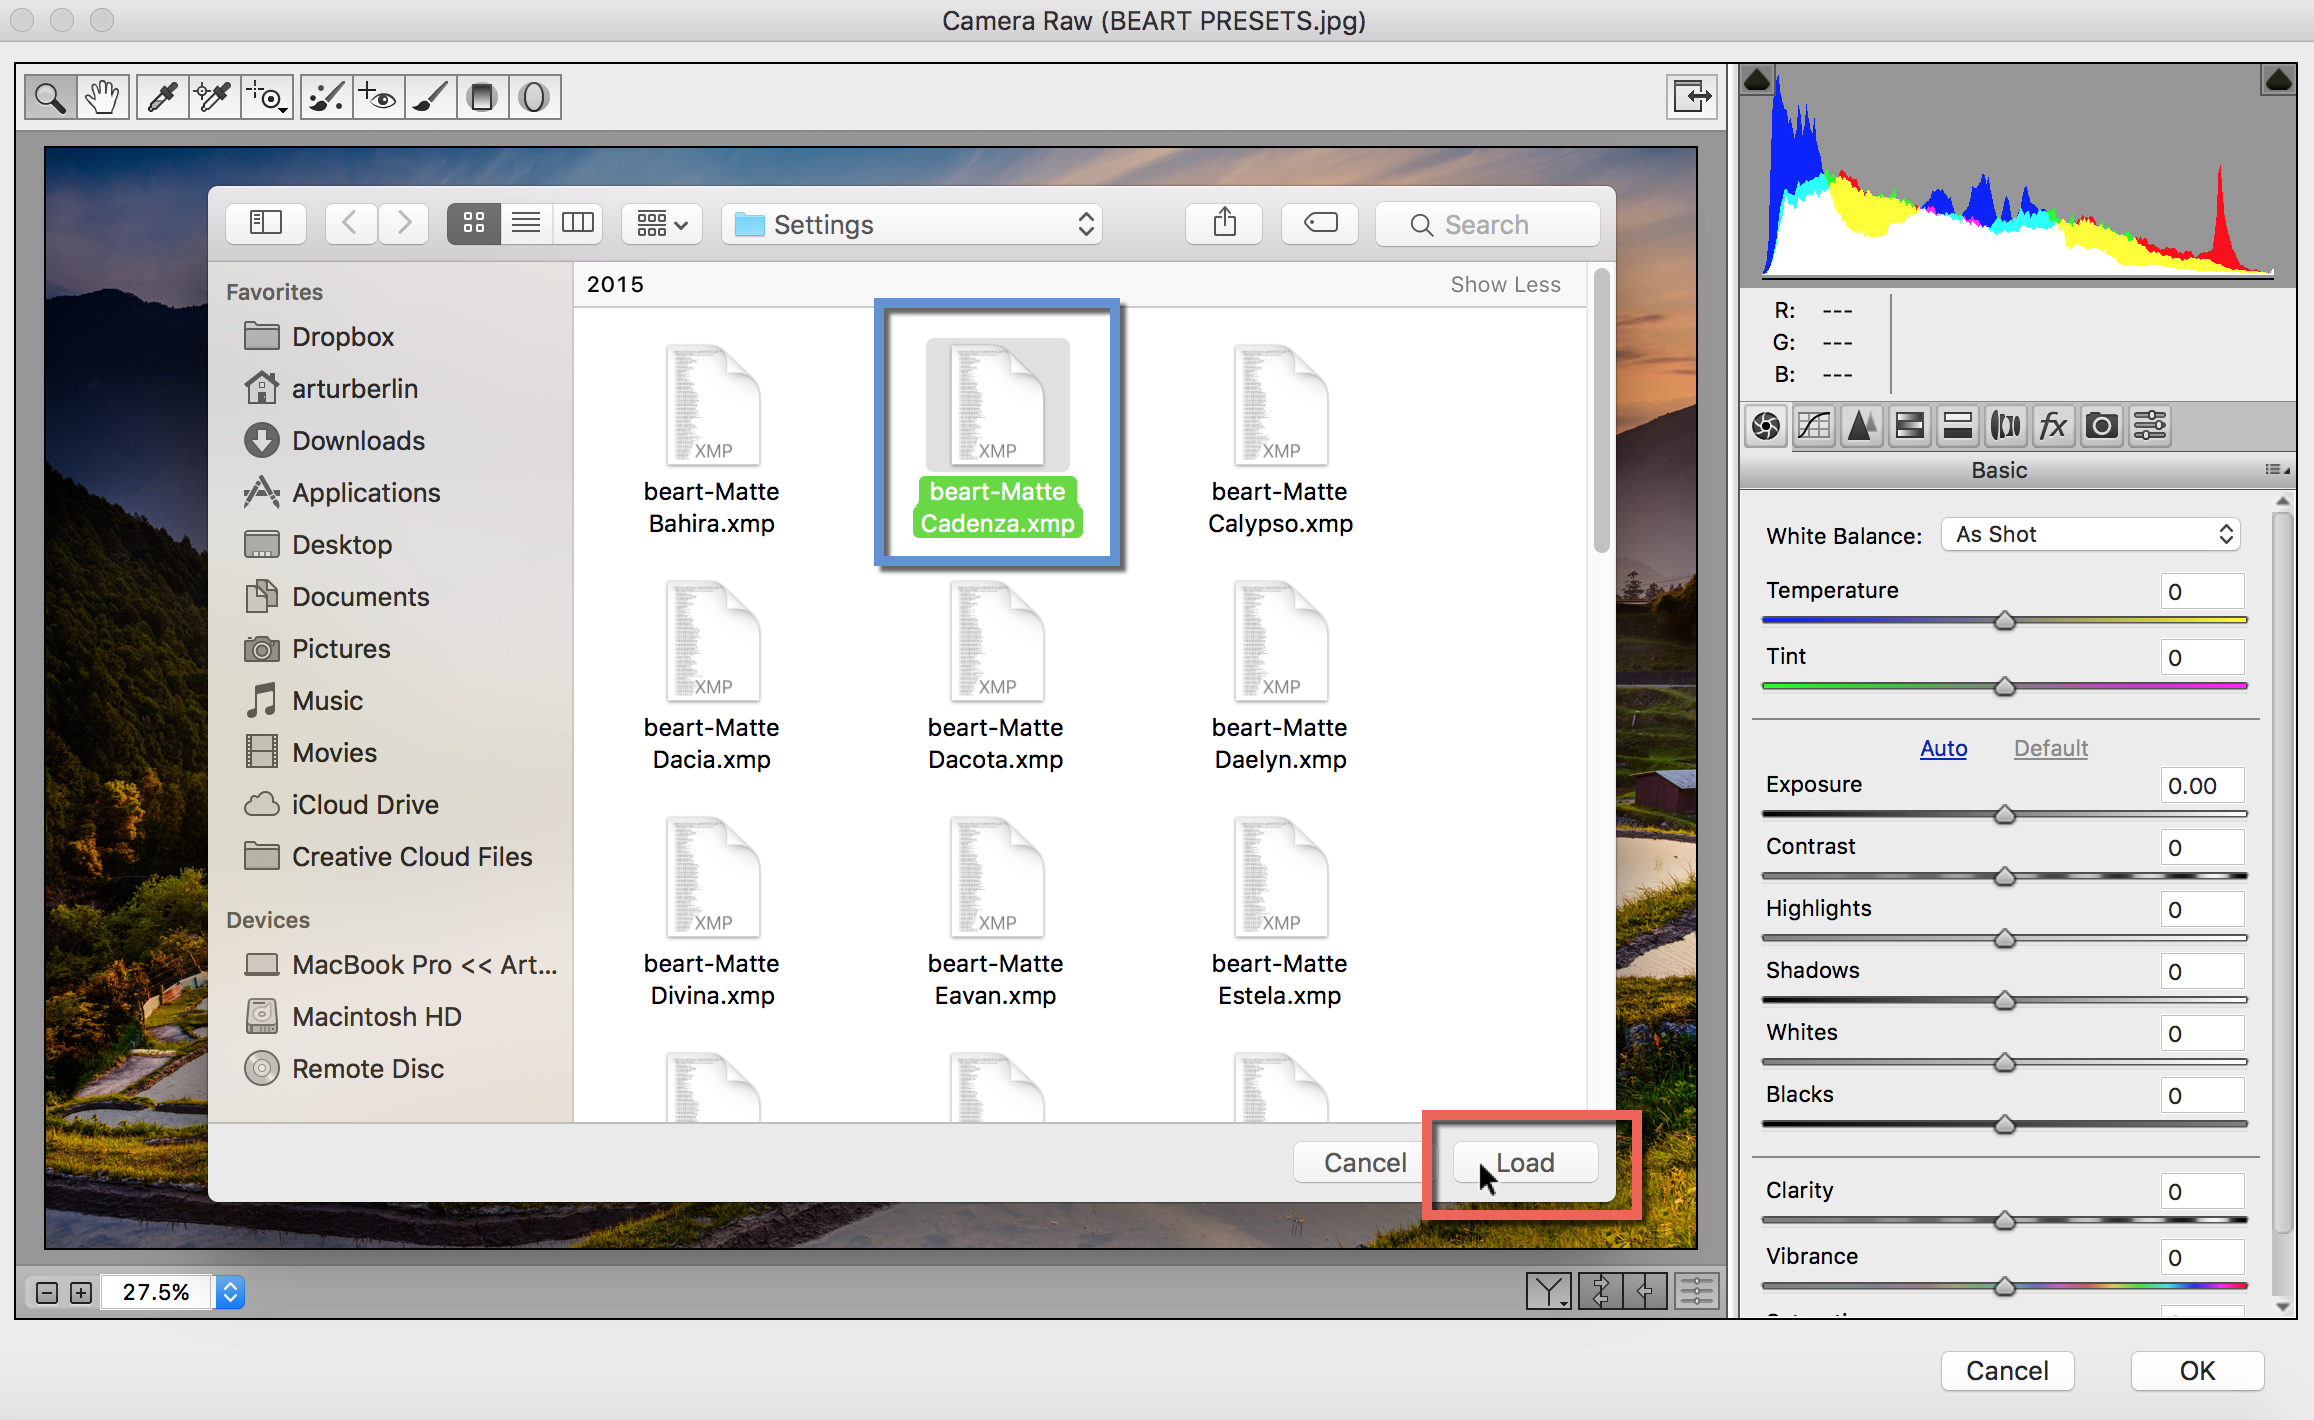
3. Choose .xmp file from downloaded and unzipped folder. Then click on Load button.
4. To apply effect, click on OK button.
VIDEO TUTORIAL
Please contact us if you have any questions or need support ~ we're always happy to assist!