Lightroom Tips for Improving Image Clarity
How much do you sharpen your images before saving your images and delivering them to a client? Sharpening isn't an often discussed issue among photographers, but it's certainly one that merits some attention.
There is no "industry-standard" amount of sharpening. But that doesn't mean you should ignore the idea of sharpening, especially when ultra-sharp images have become very popular. When you're editing in post-production, we suggest casting a critical eye. Would some level of sharpening make your picture better? If you're not sure, then go ahead and try it. The beauty of digital photography is the ability to undo any changes.
But going back to the question of how much sharpening, the answer can be a subjective one. It mostly depends on your original intent for the image and the audience. Keep in mind that ultra-sharpened images are the trend these days.
Ultra-sharp imagery
Digital photography has changed how we look - and want to look - at images. Today, we can produce super crisp pictures in ways that weren't possible even a decade ago. And then there's post-production editing which allows us to sharpen images further.
However, keep in mind that if the image is soft-focused or out of focus, then no amount of post-production editing will give you an ultra-sharp look. A horribly out of focus shot will remain just that.
How to sharpen in Lightroom
Lightroom comes with some excellent (and powerful) tools to sharpen images during post-processing.
1) Detail box
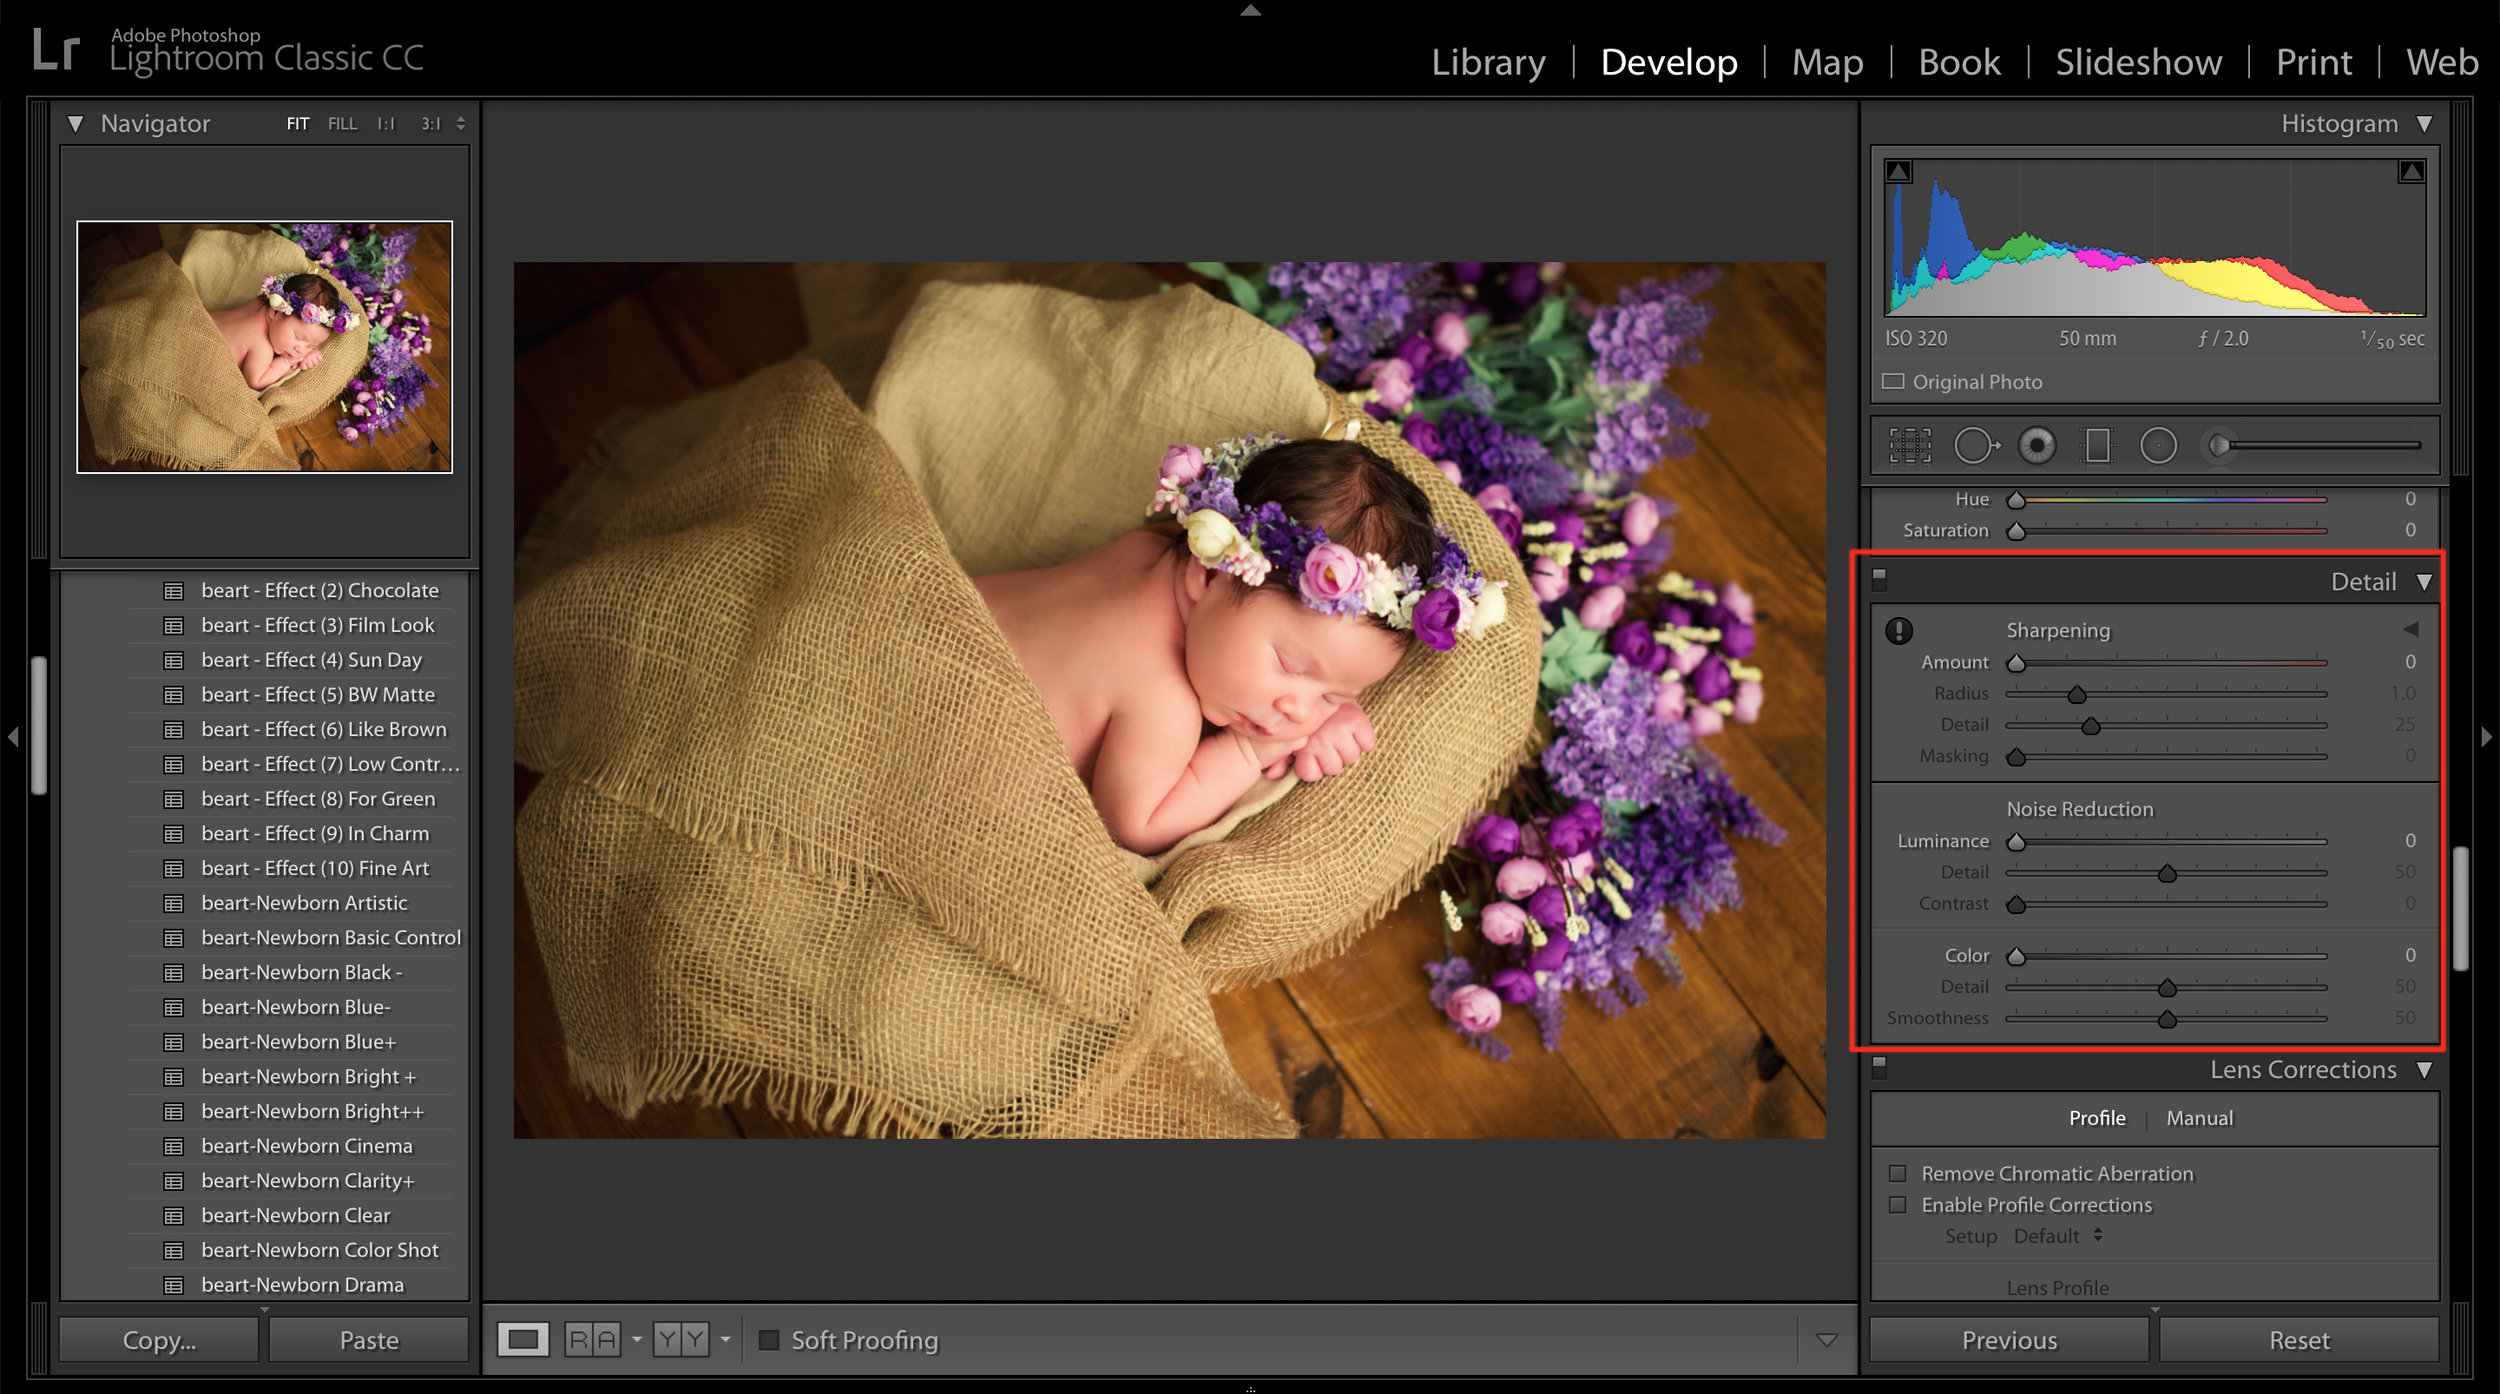
The Detail box found in the Develop module contains both Sharpening and Noise Reduction tools that allow you to enhance and fine-tune pictures and get them ready to be published. The key is to balance the amount of sharpening so that you avoid problems that often plague sharpening.
2) Two things to avoid
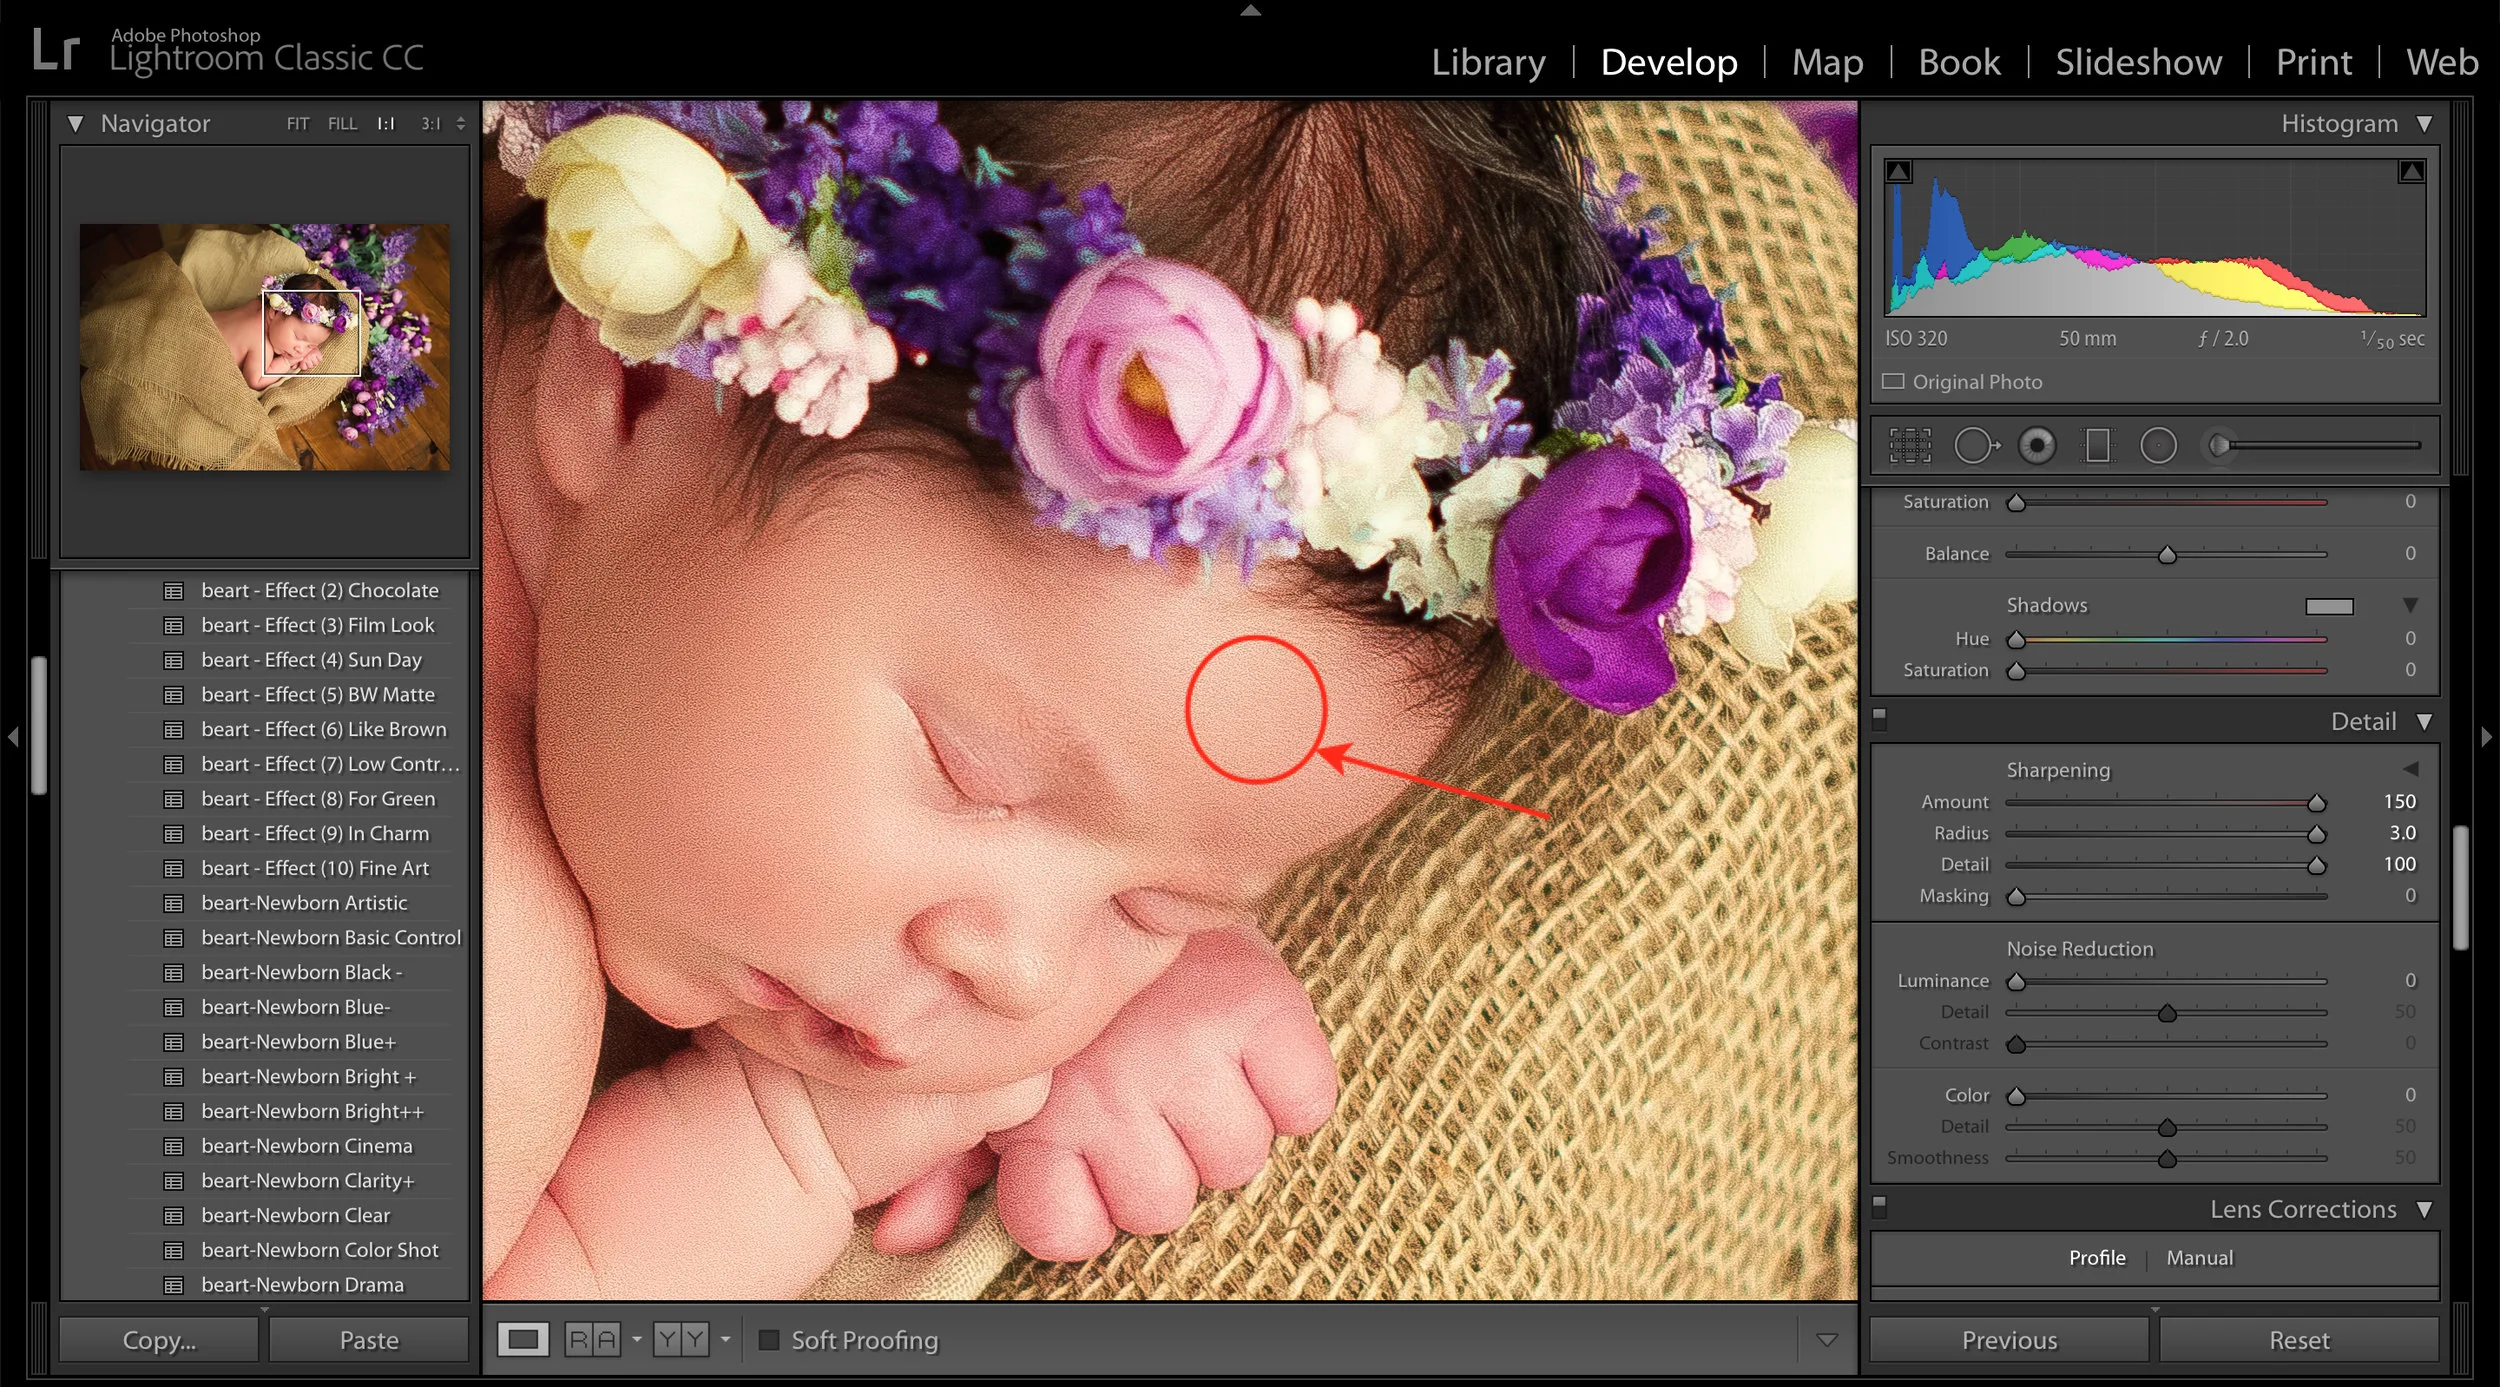
Over-sharpening: While any photographer can debate how much is the right amount of sharpening, most of us know when it's too much - the image has been over-sharpened. The resulting effect is a harsh and unpleasant look.
Too much noise: It's possible to get too much noise by over-sharpening. If you're shooting at high ISO level, then you'll need to be careful when you're sharpening an image that you don't end of with too much noise.
Remember that Lightroom doesn't modify images. Instead, it stores any changes either in a separate file or in image headers (which one depends on the image format). If you change your mind while sharpening an image, no worries, just reset the image to its original version or revert modifications through the history panel.
3) Detail Panel
The Sharpening Tool has four different sliders:
Amount – this controls the amount of sharpening you to an image. The higher the number, the more sharpening added.
Radius – the size of the sharpening area around the edges. A value of 1.0 means that Lightroom will sharpen above 1 pixel around the edges. Whatever you increase the radius by, those are the pixels spreads around the edges. A higher number for the radius means thicker edges so typically you start with 1.0 and stay under 1.5.
Detail – this slider controls the amount of sharpening on the edges or details of the image. So, a small value like 0 will only sharpen large edges, while a high value like 100 would sharpen the smallest edges. Typically, you'd set this at 50 or under.
Masking – this feature masks areas that should not be sharpened. This isn't too useful for images with too much detail or too many edges, but it's great for images that isolate the subject from the background. It's also a good tool because it takes care of the extra noise.
You can sharpen your images pretty easily by using these four sliders. You'll find that you cut back the amount of time you spend on workflow.
4) Option/Alt key
The Option/Alt key will help you see the effects of any of the sliders we just discussed. Because it can be challenging to see the effects of sharpening (unless you're at 100%), the Option/Alt key is a great solution. Press the Option/Alt key and use the mouse to move the slider from left to right for any of the four settings mentioned above.
The most important thing we can say about sharpening is to try it. Play around with it before your export or resize an image.


