A Detailed Guide how to use the Mac photo app
You're in luck if you're a Mac user who wants to do some photo edits. You don't have to resort to higher-end (or pricey) photo editing software.
You can use your Mac's Adjust tools in addition to basic edits like rotating and cropping.
Here's how to use Apple's built-in Photos app:
Light, Color, and Black & White Adjust Tools
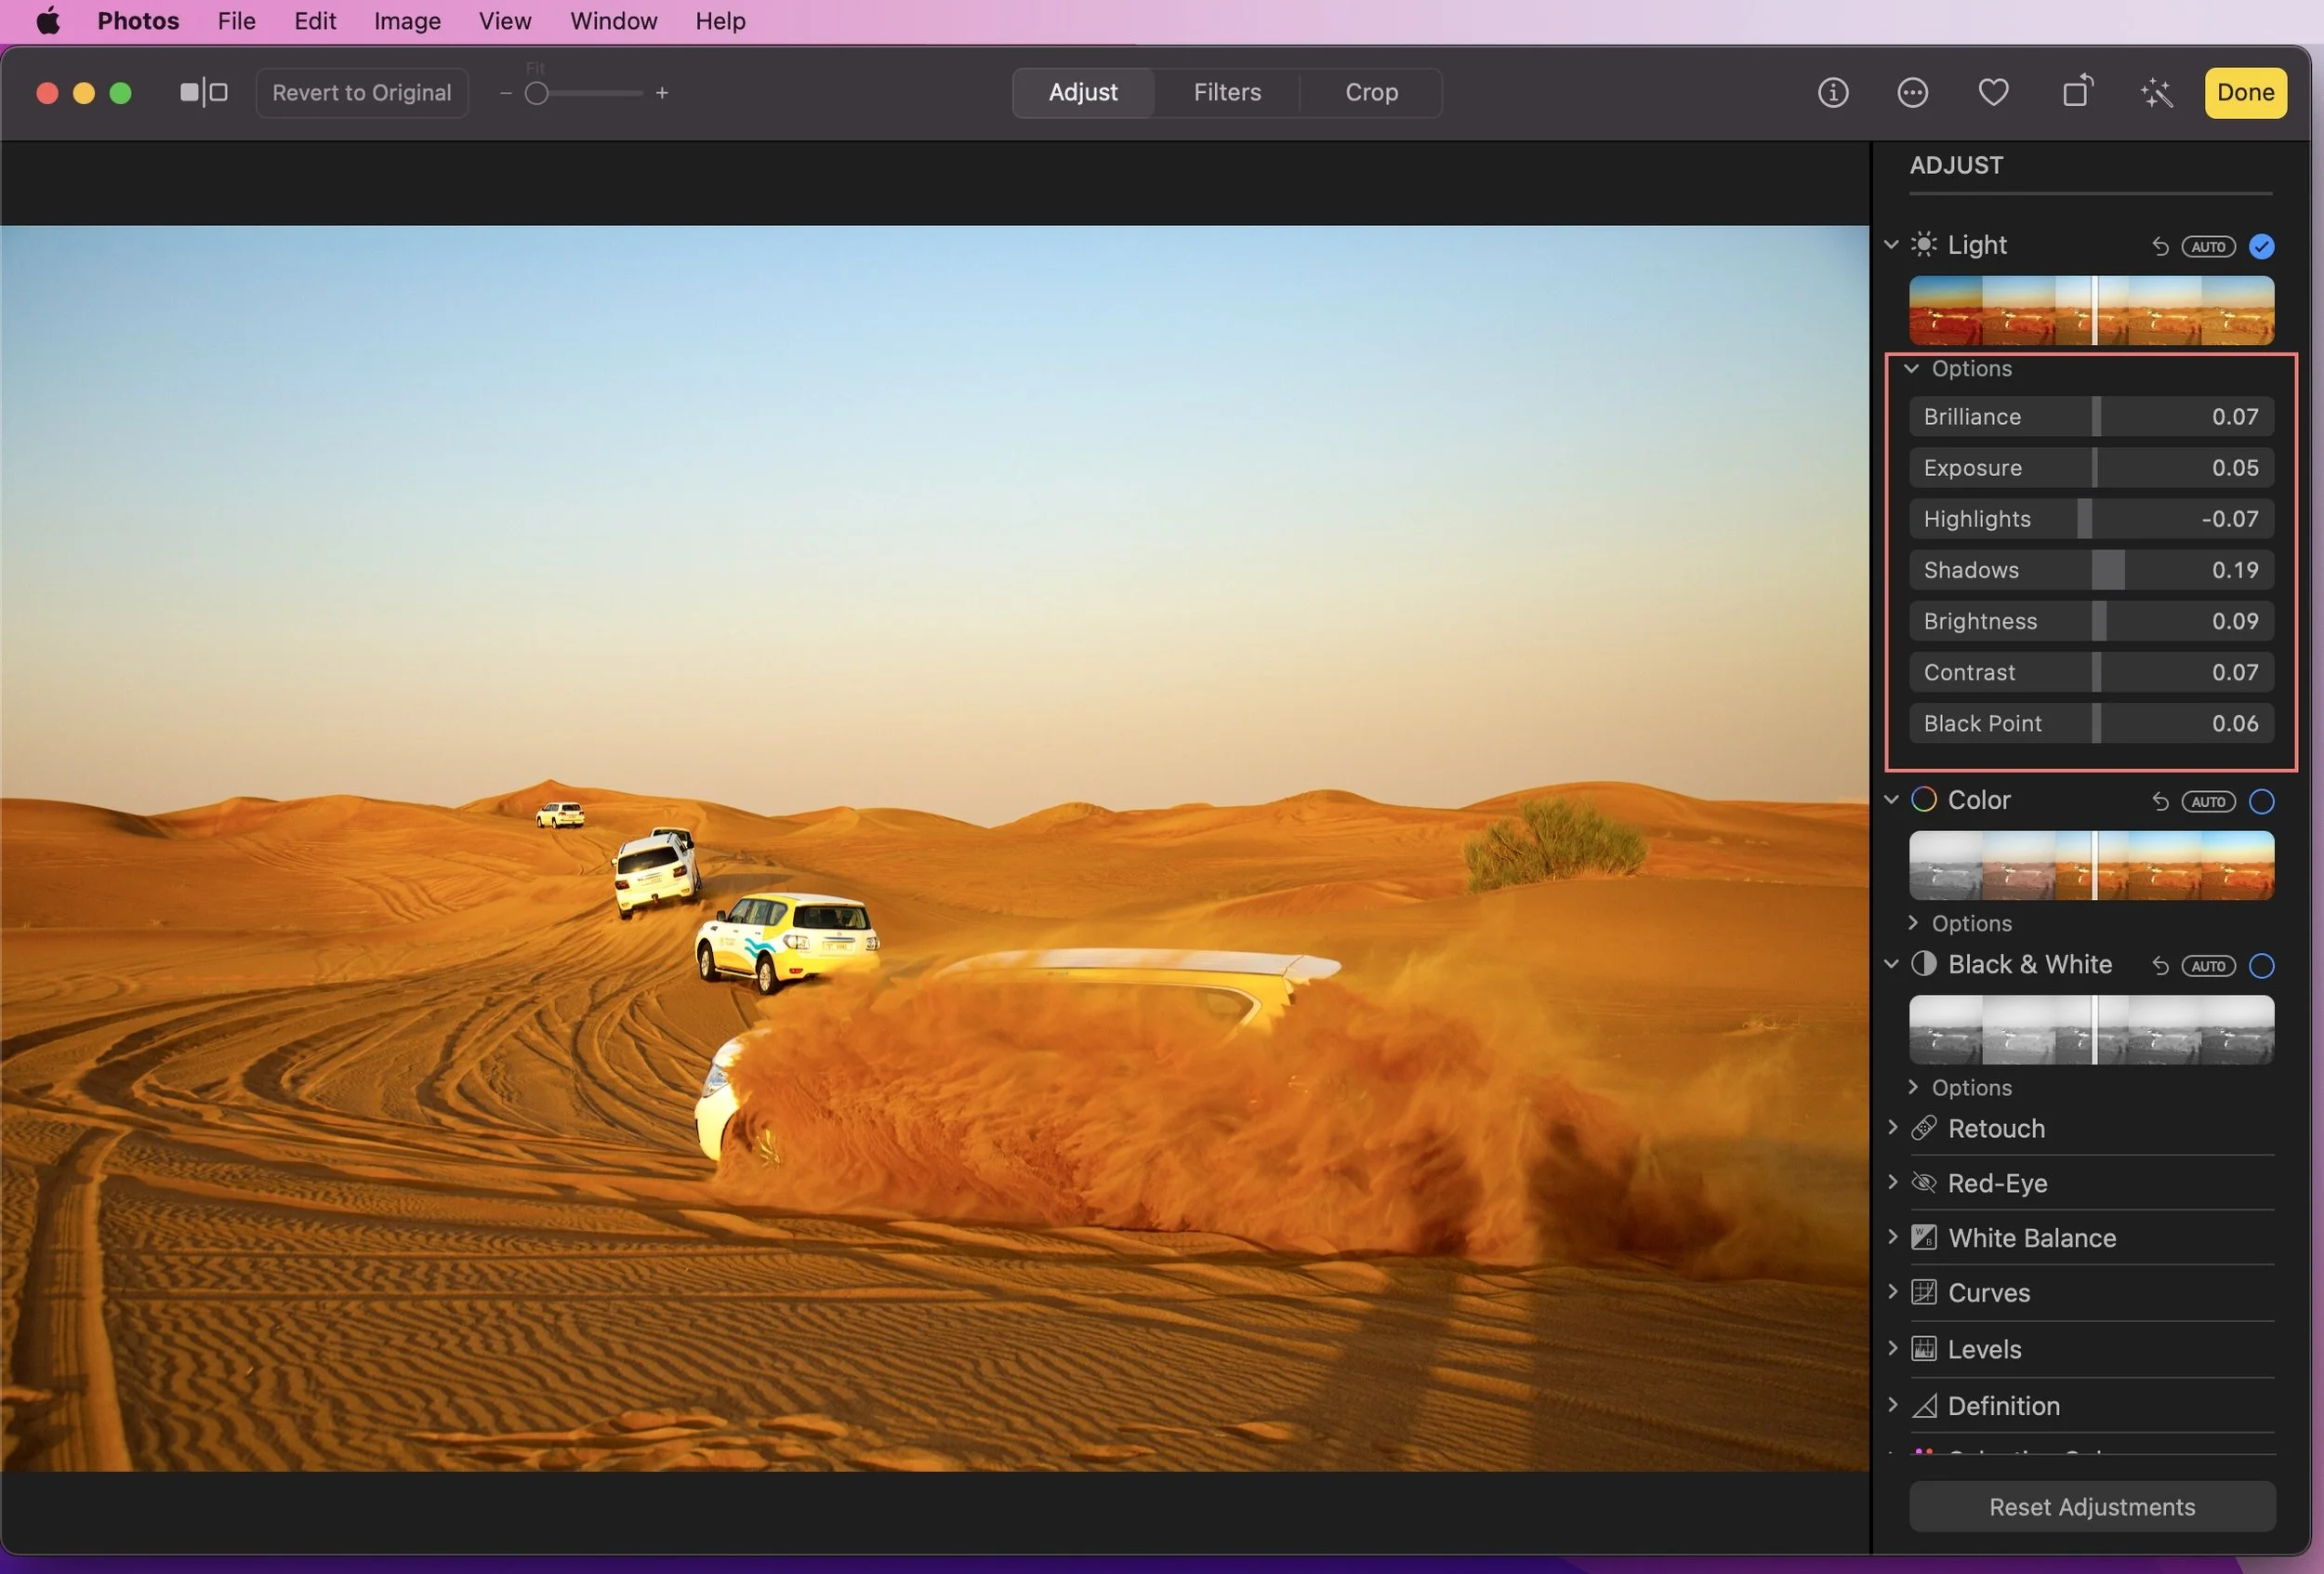
In Apple Photos, you can make basic adjustments like Light, Color, and Black & White using the corresponding sliders. Need to fine-tune those adjustments? Click on Options within each tool to make further adjustments. Read on for more instructions.
Light Options
Use the Light tool to adjust the lighting of an image using any of these individual options:
Exposure adjusts the darkness or brightness.
Brilliance adds vibrance by adding highlights, enhancing details, and brightening dark areas in photos.
Highlights will adjust the brightest parts of the image, helping to bring out details.
Shadows adjust the underexposed parts of the image.
Brightness alters the photo's brightness.
Color Options
Use this tool to enhance the colors of an image with the following options:
Saturation adjusts the light and darkness of color intensity.
Vibrance can help even out the saturation by increasing the intensity of muted colors.
Cast adjusts unwanted color cast or tints in an image.
Black & White Options
You can convert your color image into a B&W image and use these options below.
Intensity modifies the intensity of black and white tones.
Neutrals adjust the gray areas of an image.
Tone can adjust for higher or lower contrast.
Grain adjusts the amount of film grain in the photo.
You can press and hold the Option key to extend the range of values available for a slider. To undo any changes, double-click the slider.
Retouch Adjust Tool
You can remove blemishes or unwanted small details in an image using the Retouch tool.
Drag the slider to your preferred size, or press the Left Bracket ([) or Right Bracket (]) keys to do so.
Click the brush button
Click to spot retouch or click-and-drag through the section you want to retouch. Let go once you're done dragging.
Red-Eye Adjust Tool
No worries if you find some of your image's subjects have "red-eyes." Using the red-eye adjustment tool:
Click Auto to automatically remove red-eye.
You can fix it manually fix as well by using the slider. First, adjust the size of the circle to match the size of the red pupil. Position the pointer over the eye area and click on it. That should eliminate the red-eyes.
White Balance Adjust Tool
When white or gray areas in an image don't look natural or authentic in color, you can adjust that using the White Balance tool. You can balance the image's overall color and make white areas appear whiter. Click on the dropdown menu, and select one of the following options:
Neutral gray will balance the warmth of your photo.
Skin tone will adjust skin tone to balance your image's warmth.
Temperature/Tint adjusts the warmth using color temperatures and Tint.
You can also manually adjust the white balance by clicking or dragging the slider or using the eyedropper. Just select the eyedropper button and click on any photo area to automatically adjust your image's skin tone, gray, Tint, or temperature.
Curves Adjust Tool
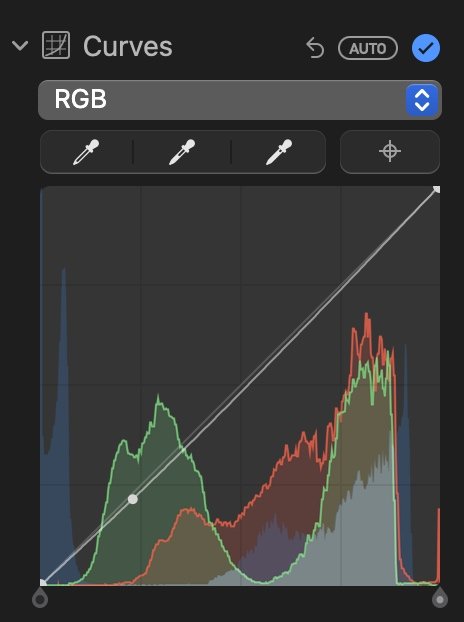
Curves (called Tone Curves in another photo editing) allow you to be more specific with tone adjustments. You can apply them to an entire image or just parts of it.
Click Auto to automatically adjust the curves of an image.
To manually adjust them, place a point along the line where you want to change.
Drag up to increase the brightness and down to lower it.
Drag it to the left to increase the contrast and drag right to decrease it.
To manually adjust the Black point, Midtones, and White point, use the eyedropper button. You can also adjust the black and white points by dragging the top and bottom handles of the diagonal line.
Curves are automatically set to RGB, but you can precisely adjust the Red, Blue, and Green colors in a photo. Click the popup menu below Curves, and select the color you want to adjust.
Levels Adjust Tool
Levels, like Curves, lets you make tonal edits. You can modify the Black Point, Shadows, Midtones, Highlights, and White Point, placed from left to right of the histogram.
Drag the handles to adjust, and hold Option and drag to control the upper and lower handles together.
You also can change a specific color cast using Levels.
Click the popup menu under Levels and choose from Luminance, RBG, or a particular color you want to change.
Definition Adjust Tool
You can add contrast, increase midtones, and add more contour and shape using the Definition tool.
Click Auto to automatically enhance the definition.
You can do it manually by dragging the slider.
Specific Color Adjust Tool
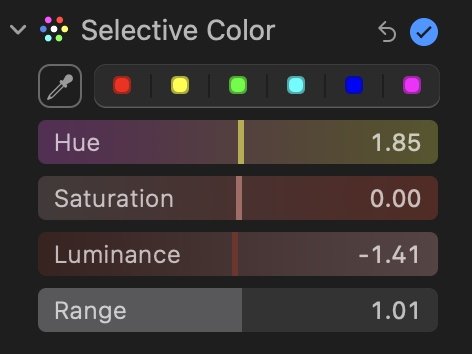
If you want to change one color to another color, Selective Color will allow you to do that.
Choose a color from the color well.
Then use the eyedropper tool to select a color from your image that you want to change.
With the color chosen, then drag the sliders for Hue, Saturation, Luminance, and Range to change it.
Noise Reduction Adjust Tool
The Noise Reduction feature will reduce any noise in your photo. Just click or drag the slider.
Vignette Adjust Tool
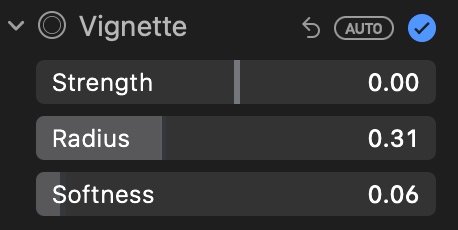
Add drama and focus to a portrait by adding a vignette, which darkens the edges of your photo.
Adjust Strength to modify the lightness or darkness of the vignette.
Radius will change the vignette's size.
Softness will adjust its opacity.
Enhancing Your Photos on Your Mac With the Adjust Tools
As we've shown, you can edit or enhance your images on your Mac using its own tools. For higher-end, professional edits, you might have to work on a software program such as Lightroom. Overall, though, Mac Photos offers many of the same editing tools you'd find on other photo-editing software.


