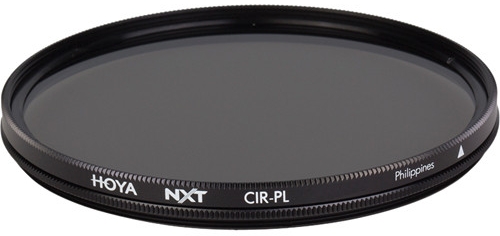
4 Camera Lens Filters You Might Want To Use
The arrival of both digital photography and sophisticated editing software have rendered many photo filters irrelevant.
Rather than depending on filters to create special effects, in most cases, you can achieve the same result during post-production editing. Even so, there are a few good filters to keep around. Here are four we think you should consider:
Polarizer Filter:
If you had to dub one photo filter the grand dame, it likely would be the polarizer. Today, it remains popular in large part because you can replicate its effects in post-production. So, what does it do? The immediate (and most obvious answer) is that it polarizes light - much like sunglasses. It reduces the amount of reflected light that hits the camera’s sensor. As a result, it diminishes glare, deepens color, and subdues contrasts.
There are two kinds of polarizing filters: circular and linear. Circular filters are probably the most popular of two. Linear filters interfere with autofocus and autoexposure of DSLRs, so you would need to adjust focus and exposure manually if using a linear filter (which also happens to be the least expensive of the two types.)
The intensity of the polarization depends on two factors:
1) Location of the light (sun): When the sun is directly overhead (or perpendicular to your lens), you get the most dramatic polarization and, thus, the most noticeable effect.
2) How you set the filter: To change the level of polarization, rotate the lens much like you might an oven knob to increase or decrease the temperature. By rotating the lens, you affect how much light enters the lens.
UV (Haze):
Back in the days of film photography, the UV (haze) filter would have been standing alongside the polarizing filter for its usefulness. It removed the ultraviolet light from affecting an image and avoided the appearance of haze.
Today, they’re no longer needed for that purpose thanks to the beauty of digital cameras and more sophisticated sensors. However, many photographers still use them as a way of protecting their lenses from being scratched or otherwise damaged.
Keep in mind that cheap UV filters can cause issues rather than eliminate them. One idea is to keep a UV filter on your lens until you are ready to use it. Then remove it for the shots and return it when you’re done shooting with that lens.
Graduated neutral density (GND):
A graduated neutral-density (GND) filter allows you to block or reduce the amount of light reflected in part of an image. It’s especially useful when you want to cut brightness to part of the picture such as water or the sky.
The filter instantly reduces brightness/light to convey color better and not have that part of the image appear washed out from too much light. This filter can be extremely useful out in the field.
However, you can replicate much of what it does with some effort and time in post-production editing. If you have it to use, then that's good. If you don't, you can adjust brightness back in the studio.
Neutral density (ND):
Unlike the GND filter which reduces light to just a part of an image, this filter minimizes all light entering your lens. They come in varying strengths. (For each stop, incoming light is reduced by half.)
The ND filter allows you to work with far slower shutters speeds than you normally would. It’s mostly useful in two ways: when you desire a shallow depth of field and to smooth out the blur of motion in an image.
You can use this filter to compensate for ISO and bright lighting. With moving water, for example, it softens the blur of motion for a more ethereal look while maintaining the impression of movement. Without an ND filter, this effect could be tough to achieve.
Photographic technique is personal and often developed over the years. Some stalwart users of filters will likely have their favorite. Some will continue working with them in combination with sophisticated editing software. You can experiment to find what you are comfortable with when it comes to achieving your desired effects.


