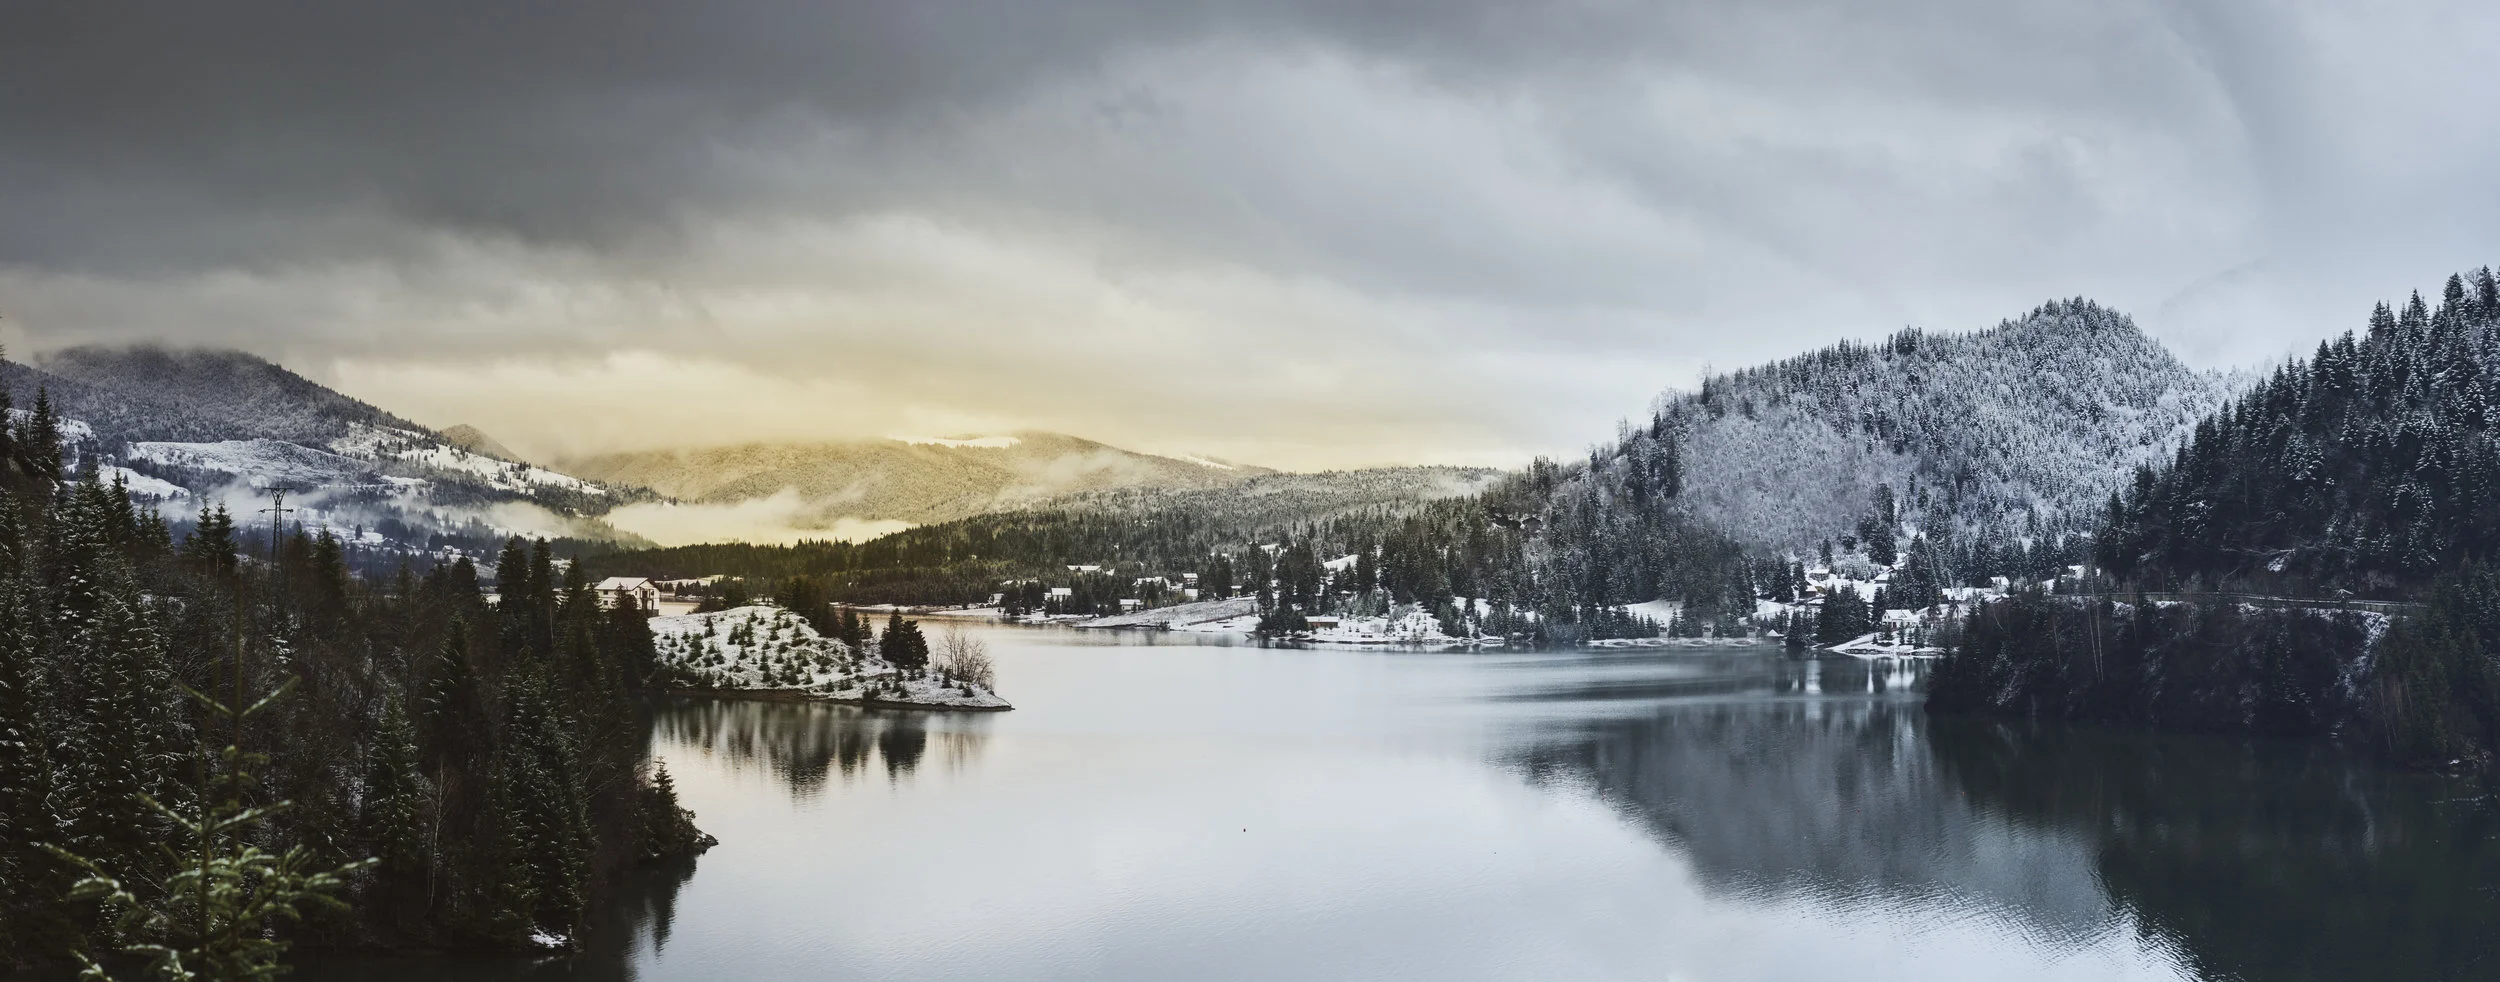
5 Tips for Shooting Awesome Panorama Photo
A panoramic is often described as a photo much wider than it's tall. This is often the case when attempting to photograph a wide landscape. You will find it difficult to bring the whole area into view. Creating extra-panoramic shots is a way around this problem. Panoramic photography ensures that you capture beautiful scenes that appear too wide (or too tall for vertical panoramic images).

This is a concept that you've probably encountered in your photography class in several essays you write on photography. If you are not conversant with this type of projects, you buy an essay paper from PapersOwl or hire a professional to write an essay for you and this will give you a firmer grip on the secrets behind successful photography and streamline your learning process. Even better, when required to capture some specific photographs, you can request a professional from the platform to work on the project.
Your essay writing need not be a constraint to the limited time you have to work on tons of fieldwork exercises in photography. Reach out for essay writing services whenever you need someone to help. Browse the papersowl.com reviews for details on the best writing services online. There are professional photographers on the platform who are conversant with the subject and have all the required resources to make your project a success. Meanwhile, here are our best shooting tips in panorama mode, whether iPhone or professional camera photography.
1. A Good Panoramic Photography Starts with the Content of Your Scene

Not all subjects lend themselves to creating great panoramic pictures. A short round tree, for instance, is far from making a superb panoramic subject. A large gathering of friends or family, a longship, a wide beach scene or a beautiful landscape will make an excellent recipe for panoramic photography.
Analyse the content of your scene and determine the contribution of each one to your photo. This helps you decide on what to include (and exclude) from the scene ahead of taking your photo.
2. Leverage on the Panoramic Mode
The first thing whenever you turn on most point and shoot cameras is the last panoramic picture you took and then the live view of the scene in front of the camera. This ordered sequence of images is essential in lining up and overlapping images. This sequencing is a feature of the panorama mode.
This mode also ensures the exposure settings between shots remain constant. This creates even lighting and makes stitching a lot easier. Below is an image by Canon SD630 point and shoot in the panorama mode. The photos take over 25 images overlapped.
3. Watch How You Overlap

Overlapping is a core function in panoramic photography. Watch out for even a single slip which can potentially ruin your shot. Your particular camera will decide for you the sweet spot. Most people work with 15% or slightly above.
A sizeable amount of overlap reduces "flaring" where software has to use all of the image frames, including the corners that are prone to distortion resulting majorly from your lens selection.
4. Your iPhone Photography Doesn't Require Stitching

The Pano feature in iPhone photography excels at creating beautiful panoramic images. To get started, you need to open this native app in your iPhone and select the Pano shooting mode.
Do a 'dry run' to what constitutes the appeal in your final photo. For a horizontal panorama, have your camera upright in the portrait orientation.
Your iPhone Exposure
The camera will settle for the best exposure based on the lighting levels around the scene at the start of your shot. Uneven lighting may lead to under or over-exposure. The best practice is to expose the area of the scene with medium lighting. The 'dry run' should help you determine this area.
Once you've located a spot with medium brightness, point your iPhone at it and click while holding the screen on this spot. This locks your exposure for the entire duration of the shot.
5. Don't Overlook the Vertical Panoramas

The same principles hold for vertical shots. You may turn your camera on its side if horizontal orientation does not work well.
Some sources of vertical panorama shots that you can explore are tall buildings and waterfalls.
Vertical panoramic photography works well with iPhones too. You may turn your camera into a landscape orientation and pan vertically instead of horizontal motion. The Pano feature works in a way similar to that in a horizontal orientation.
Conclusion
Creating panoramic images has become increasingly easier with the advent of advanced software. You can now use your PC to create powerful panoramic photos using a combination of features and tools that come with advanced software. However, you need to stick to the basic guidelines of panoramic photography while in the field because your computer cannot fit everything.